Ended up machining the drive side bearing surface as well as the mag flange mating surface while the engine was apart as it had a beat up bearing race on the mag flange end. Guessing it came down to misalignment due to all the welding done to the cases.
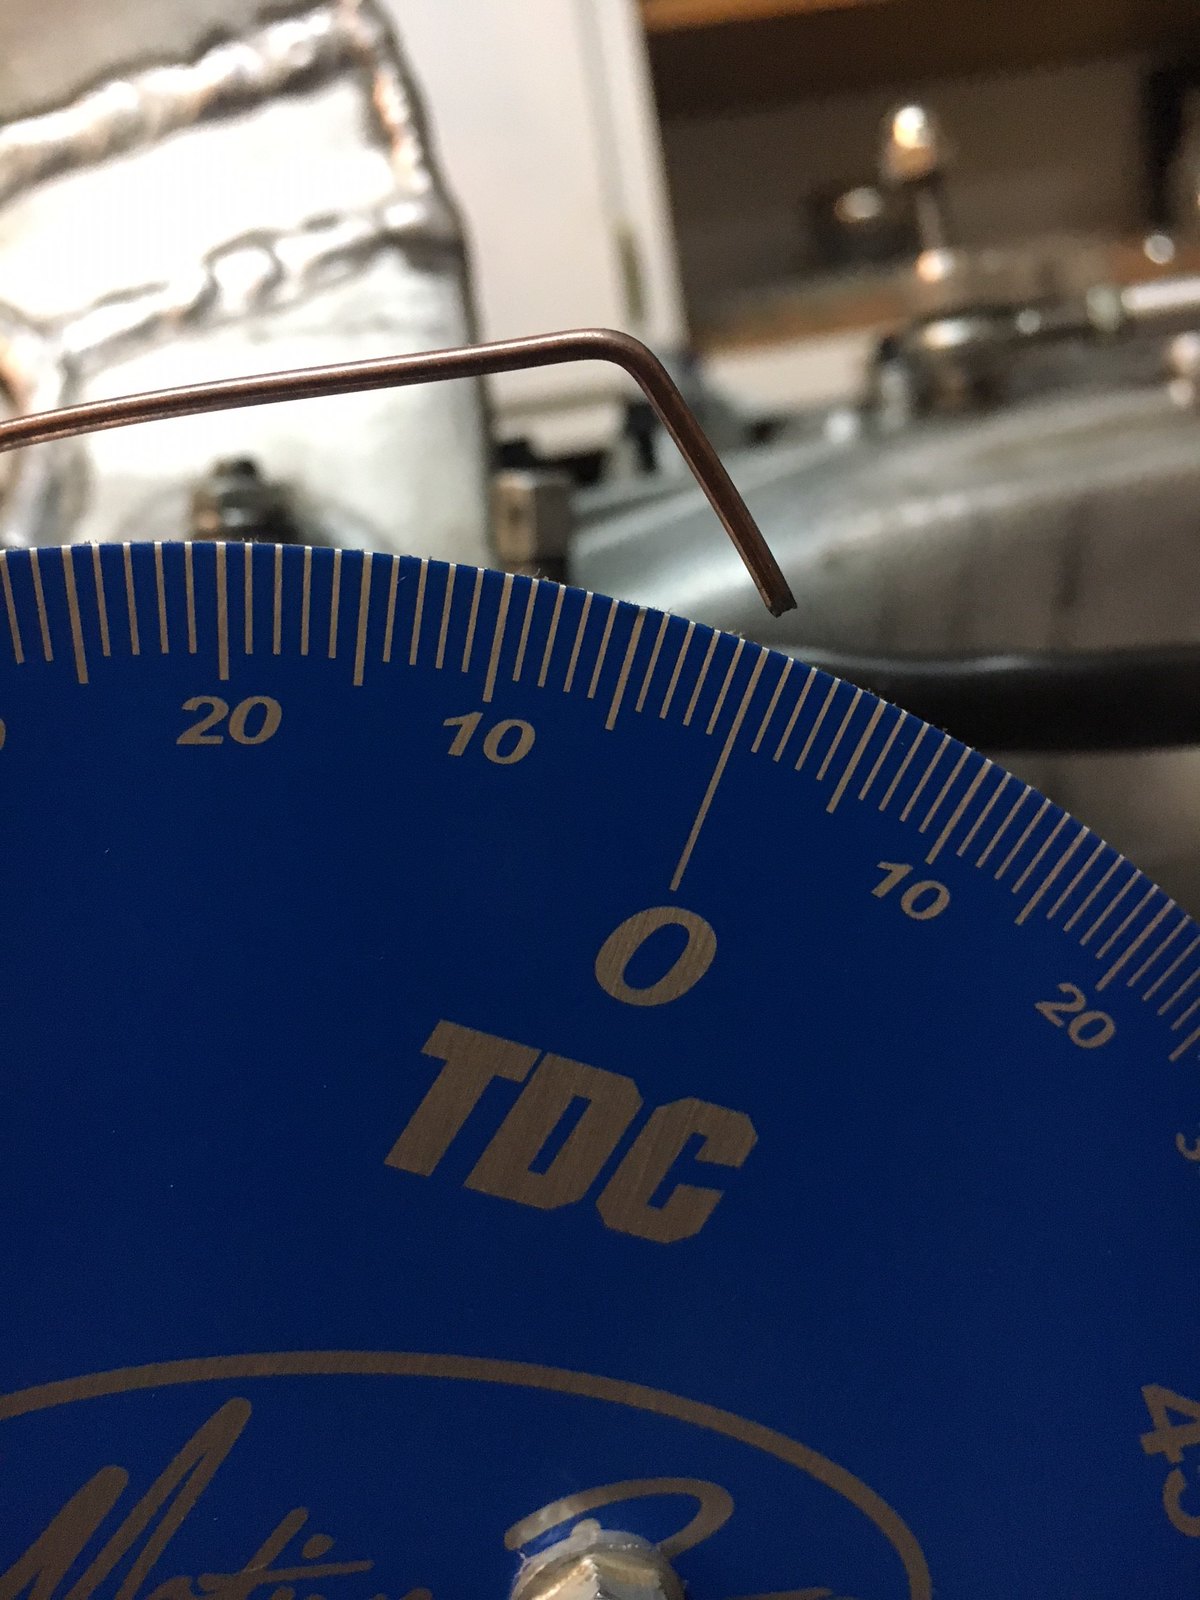
IMG_6292 by PotvinV8, on Flickr
Trued the crank as well as it was out a few thou more than I was comfortable with.
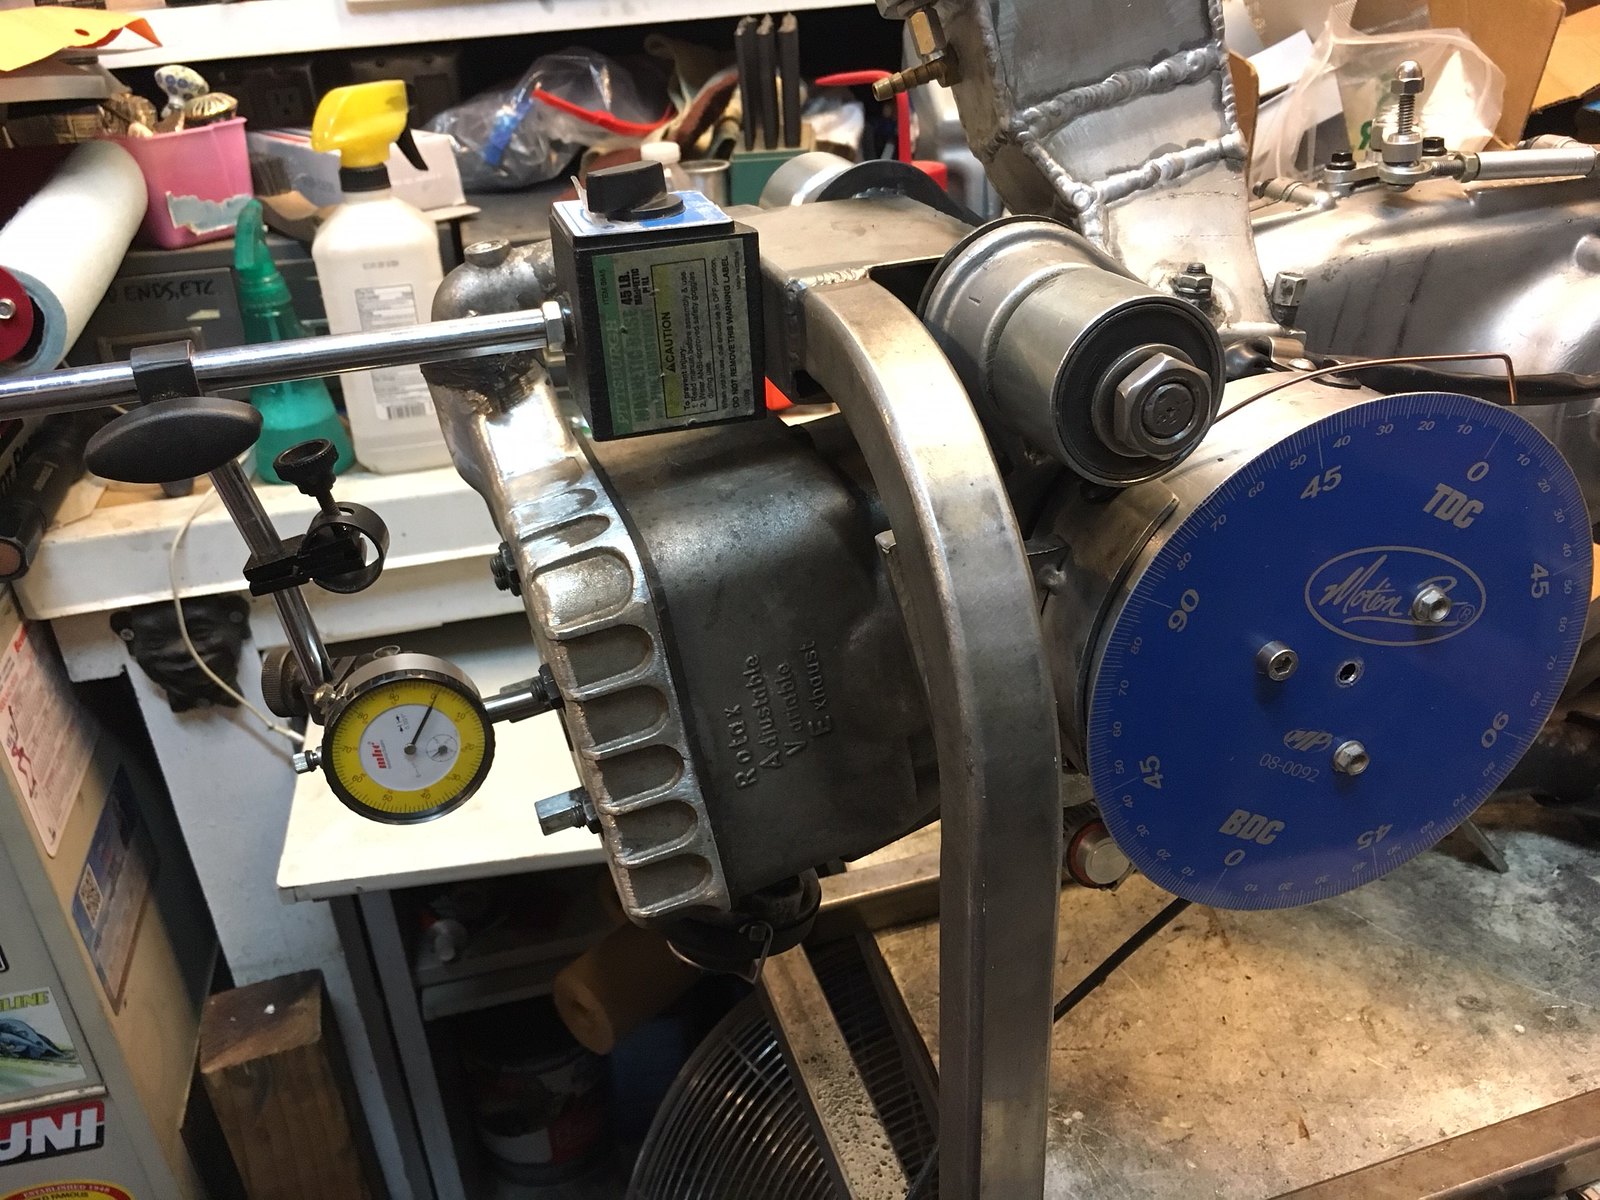
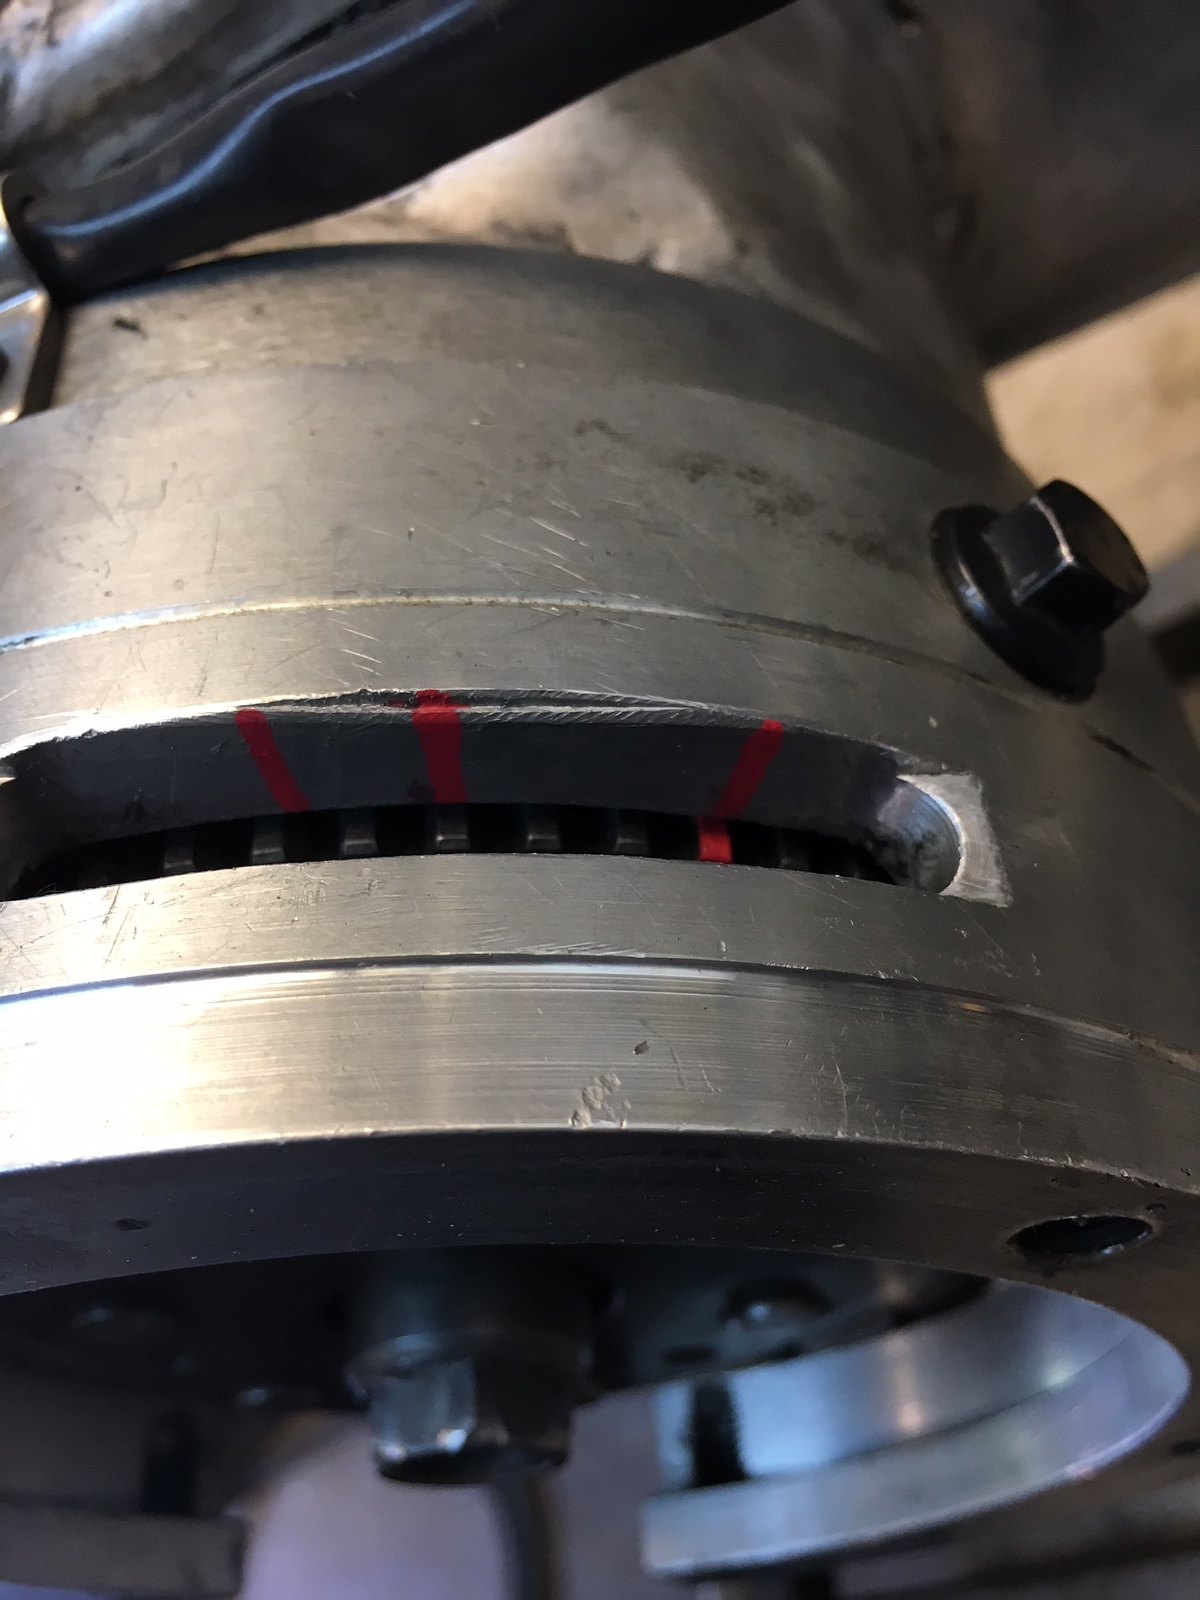
IMG_6273 by PotvinV8, on Flickr
It's back to under a thou runout now, so all's well.
Waiting on a couple small parts then the motor should be ready for reassembly. In the meantime, I've been chasing a handful of little things and think the damage came down to too much positive deck height resulting in too much compression which built up excess heat and probably caused the piston to contact the head. Perhaps more than once! The positive deck height situation also caused the piston to hang over the exhaust port at BDC, which no doubt exacerbated the problem. I've got a new base gasket installed that puts things more in line with where they need to be and think I've got the issues whipped. Hoping to have everything back together and on the road in the next week or so. Stay tuned!
Rotax 300 builld
-
- registered user
- Posts: 1693
- Joined: Tue Jan 31, 2012 8:54 pm
- Main scooter: Lambretta GP
- Contact:
Good work.
Thanks Adam!
While I'm waiting for a couple small parts from Jet200.com, I thought I'd install the EGT gauge from Classic Instruments.
IMG_6327 by PotvinV8, on Flickr
Decided to mount it up on the inner legshield so that I can see it if it reaches a temperature that requires my attention (it's programmable and flashes red when the programmed temp is reached). Hopefully this will prevent the previous adventure from occurring again.
Both gauges are very bright...
IMG_6326 by PotvinV8, on Flickr
You can just make out the Voltmeter LED above and to the right of the tach. Reading green so all's well! It changes from green to orange to red depending upon the charge state of the battery. The bright green light on the cluster is the low fuel light that I wired in with a sensor in the tank and below that is the high beam indicator. Happy everything is working. If I add the A/F gauge, it starts looking like a serious business!
- coaster
- registered user
- Posts: 3125
- Joined: Wed Jan 07, 2009 12:35 pm
- Location: London and Norfolk
- Contact:
Without checking back, I can't remember if you have a variable ignition fitted? If you have, your egt will vary according to the ignition curve as the flame front move towards or away from the exhaust port....might play havoc with your warning light
-
- registered user
- Posts: 908
- Joined: Wed Jul 15, 2015 11:52 pm
- Main scooter: lambretta gp
- Location: east yorkshire
- Contact:
Hi ryan,
pleased to see you have made some progress with your rebuild, i had a feeling that your deck height was part of the problem, there was a visable ring on the crown of the piston where it looked like it had been touching, fixing this issue will help you a lot, my mag mounting side was distorted and i had to get it re-faced at my local machine shop, its nice to see your getting there,
holty
Got the motor back together and everything looks really good. With as much one-off fabrication involved as this project has, it's hard to decide how far to take something without knowing if it will work or not. I think that's one of the biggest factors that went into the initial failure; lack of attention to the usual minutiae due to the unknown. It's hard to justify spending hours and hours on something that isn't going to work, so you have to decide when to "call it". At the end of the day, I'm surprised it all worked as well as it did and the fact that it seized on the dyno and didn't blow the bottom of the crankcase out doing 65mph is OK with me!
Needless to say, I'm embarking on Chapter Two, so to speak, and I'm approaching things as if they're going to work, paying careful attention to detail.
First off, I need to check the port timings, TDC, and the like...
TDC by PotvinV8, on Flickr
TDC on mark by PotvinV8, on Flickr
I added some timing marks so that I can strobe it once it's up and running and then program the MSD ignition to suit. Rotax specs call for 17-degrees initial and 24-degrees total, all in by 4,000rpm, so that's what I marked, in addition to TDC.
Timing marks by PotvinV8, on Flickr
I also cc'd the combustion chamber to ensure we didn't make the same mistake as last. The combustion chamber volume came in at spec, 28cc, so all's well. I also checked the squish and that was within spec too. Things are looking good!
CC head by PotvinV8, on Flickr
The motor is back in the bike and I'll be concentrating on sorting out the exhaust next. I have a KTM300 FMF pipe that I'll be using as a base, along with a few specs pulled from various sources for comparison. Hope to be making blue smoke again very soon!
-
- registered user
- Posts: 908
- Joined: Wed Jul 15, 2015 11:52 pm
- Main scooter: lambretta gp
- Location: east yorkshire
- Contact:
that all looks well thought out and much more chance of being a reliable engine, ive had a few teething troubles with mine, but nothing too seroius, hope you get it up and running soon, keep up the good work and keep us posted,
holty
holty
Thanks Holty!
Get her kicked off tonight without incident. Sounds good! Hoping to have a chance tomorrow to check timing and then have a putt around the block.
A couple from tonight. Had a blast 'round the neighborhood and things feel very promising.
[youtube]https://youtu.be/tolI_67VNfQ[/youtube]
[youtube]https://youtu.be/zhoG2D2Afc8[/youtube]
[youtube]https://youtu.be/tolI_67VNfQ[/youtube]
[youtube]https://youtu.be/zhoG2D2Afc8[/youtube]
Getting ready for this weekend's Classic Not Plastic event here in Long Beach and it looks like we gots some problems! I thought the charging system wasn't working as it used to and after a probe with the multimeter, my suspicions were verified. Looks like the flywheel and the stator became a bit too intimate...
IMG_6742 by PotvinV8, on Flickr
IMG_6743 by PotvinV8, on Flickr
That's on me I guess, though I could swear things were dialed in upon assembly. Luckily, I had a stock stator on hand to swap out, so we're good to go!
Will post results from this weekend. It will either end on two wheels or four, on the back of a tow truck!