Page 12 of 25
Re: Rotax 300 builld
Posted: Sun Sep 07, 2014 9:12 am
by ducksta
start to finish how long to make a cylinder?
Re: Rotax 300 builld
Posted: Sun Sep 07, 2014 10:31 am
by RManson
An evening and the following afternoon, but that's me fudging through it. I could knock one out in a few hours now.
Re: Rotax 300 builld
Posted: Tue Sep 09, 2014 1:53 pm
by stokky
ha ha ha you must have an arm like popeye
when I knock one out, its all over in a few seconds !!!!!!!!!!
ooh er missus !
Re: Rotax 300 builld
Posted: Tue Sep 09, 2014 6:16 pm
by RManson
HAHAHAHAHA!
Re: Rotax 300 builld
Posted: Sun Oct 19, 2014 5:40 am
by RManson
I added a clamp to the master cylinders as I didn't trust that an o-ring would keep them tight. A modified aluminum line clamp does the trick and ensures the cap won't vibrate loose.
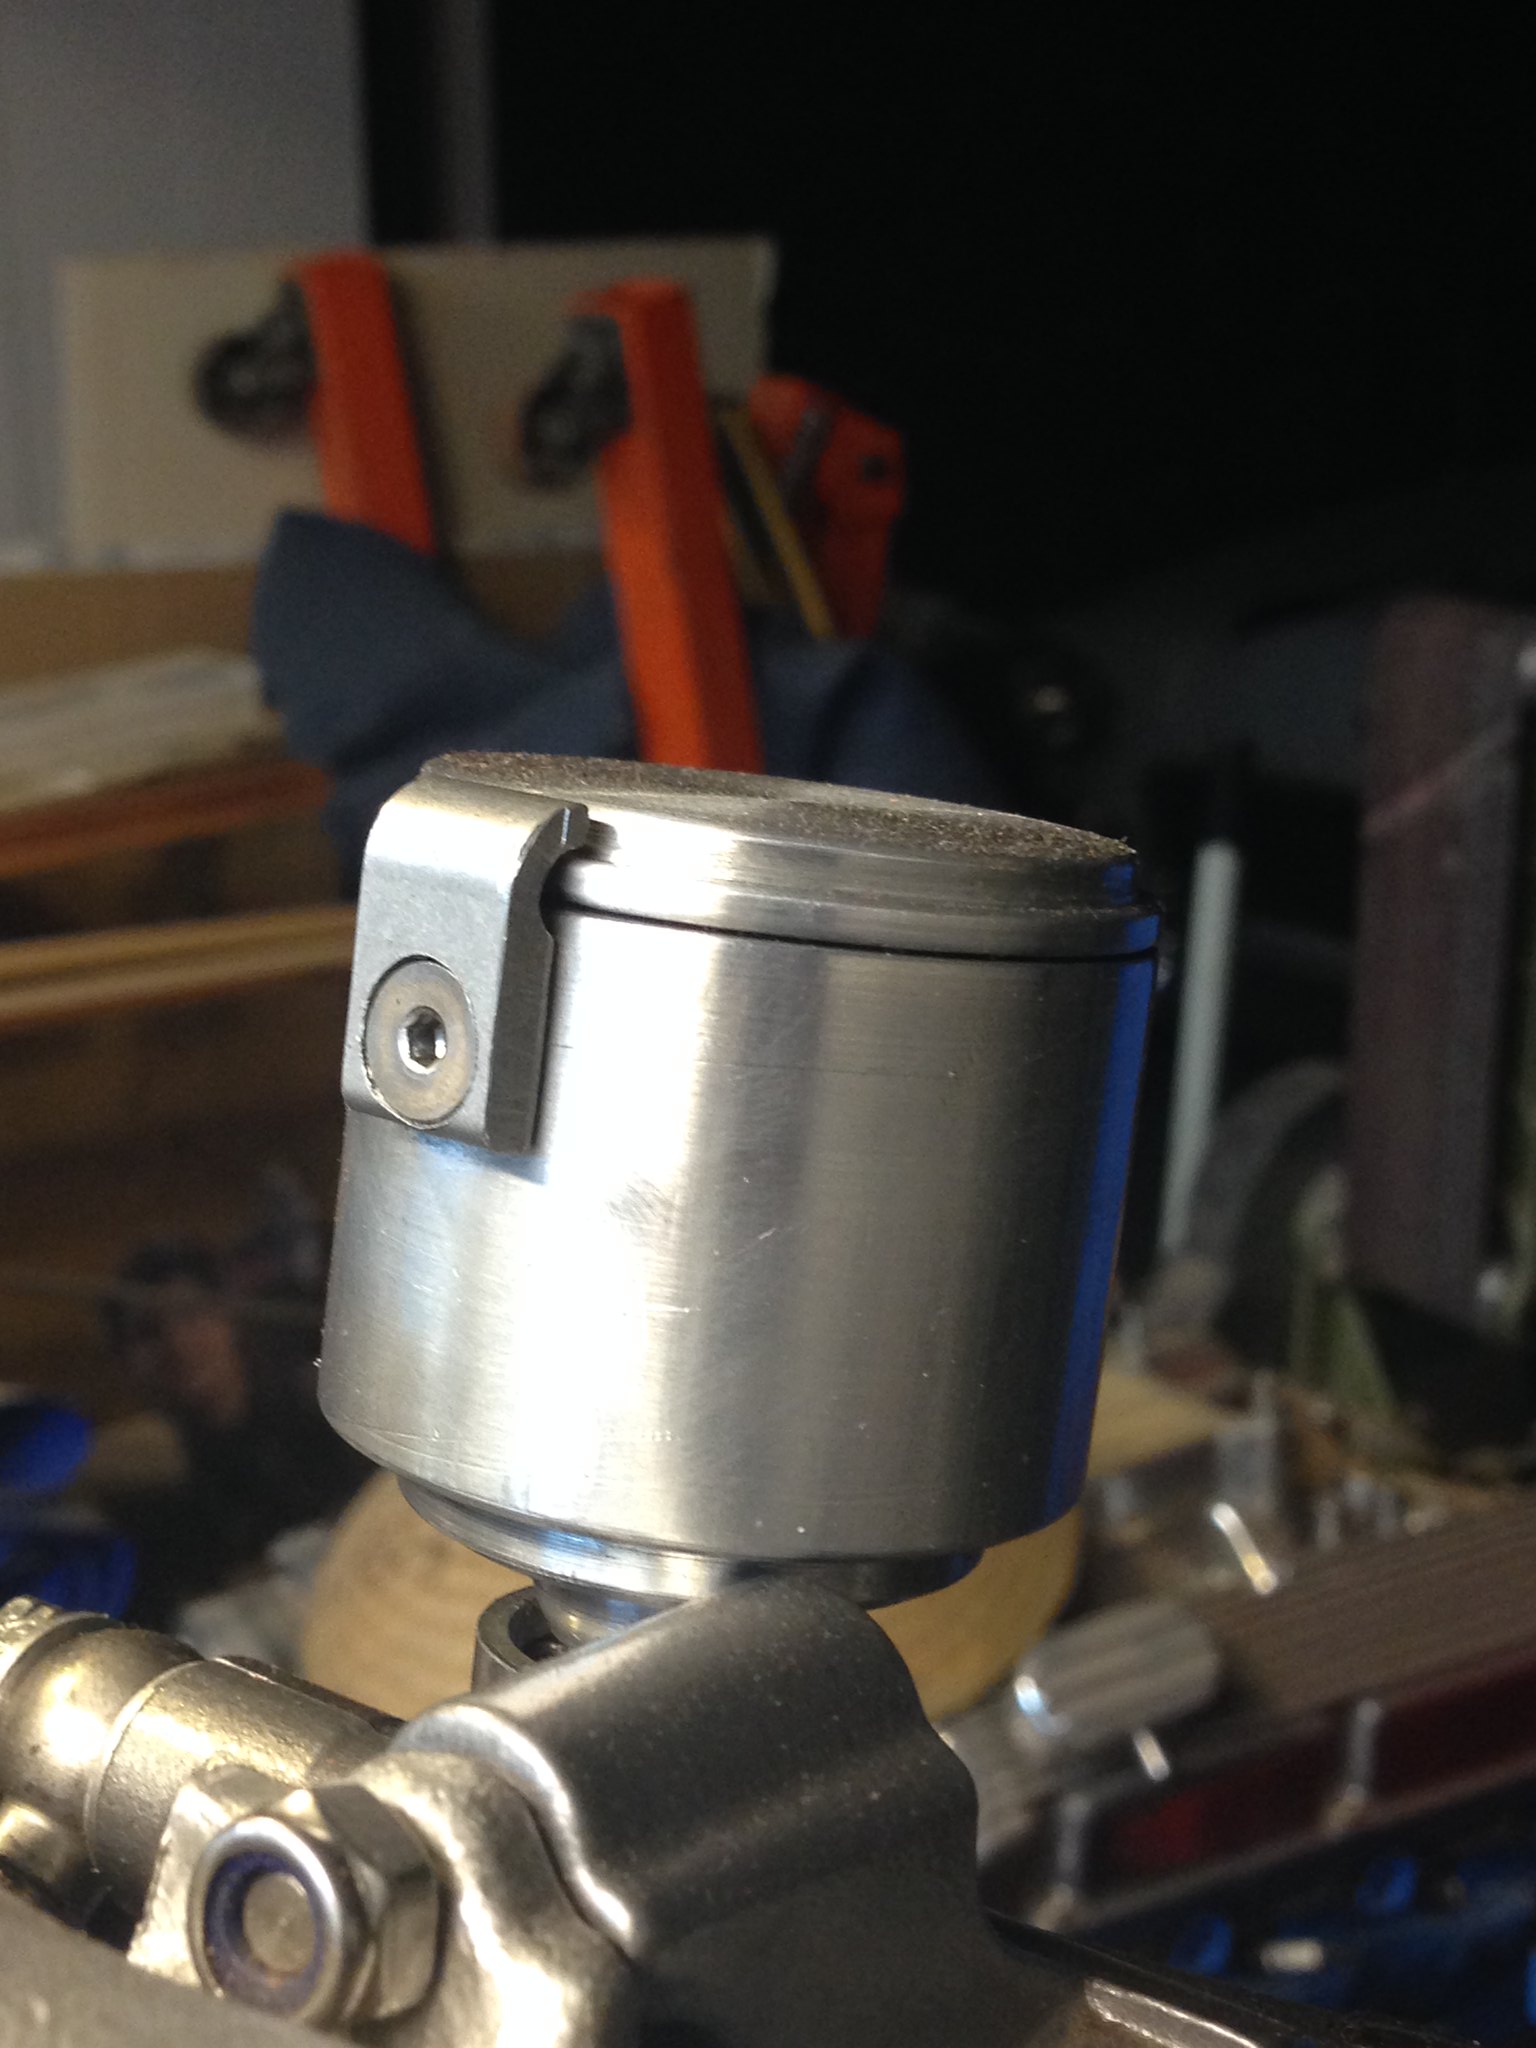 Rotax Lamby build-083
 by
PotvinV8, on Flickr
Re: Rotax 300 builld
Posted: Sun Oct 19, 2014 5:57 am
by RManson
Using the foam mock-up tank, I was able to make the real deal using stainless sheet. Here are the pieces prior to assembly...
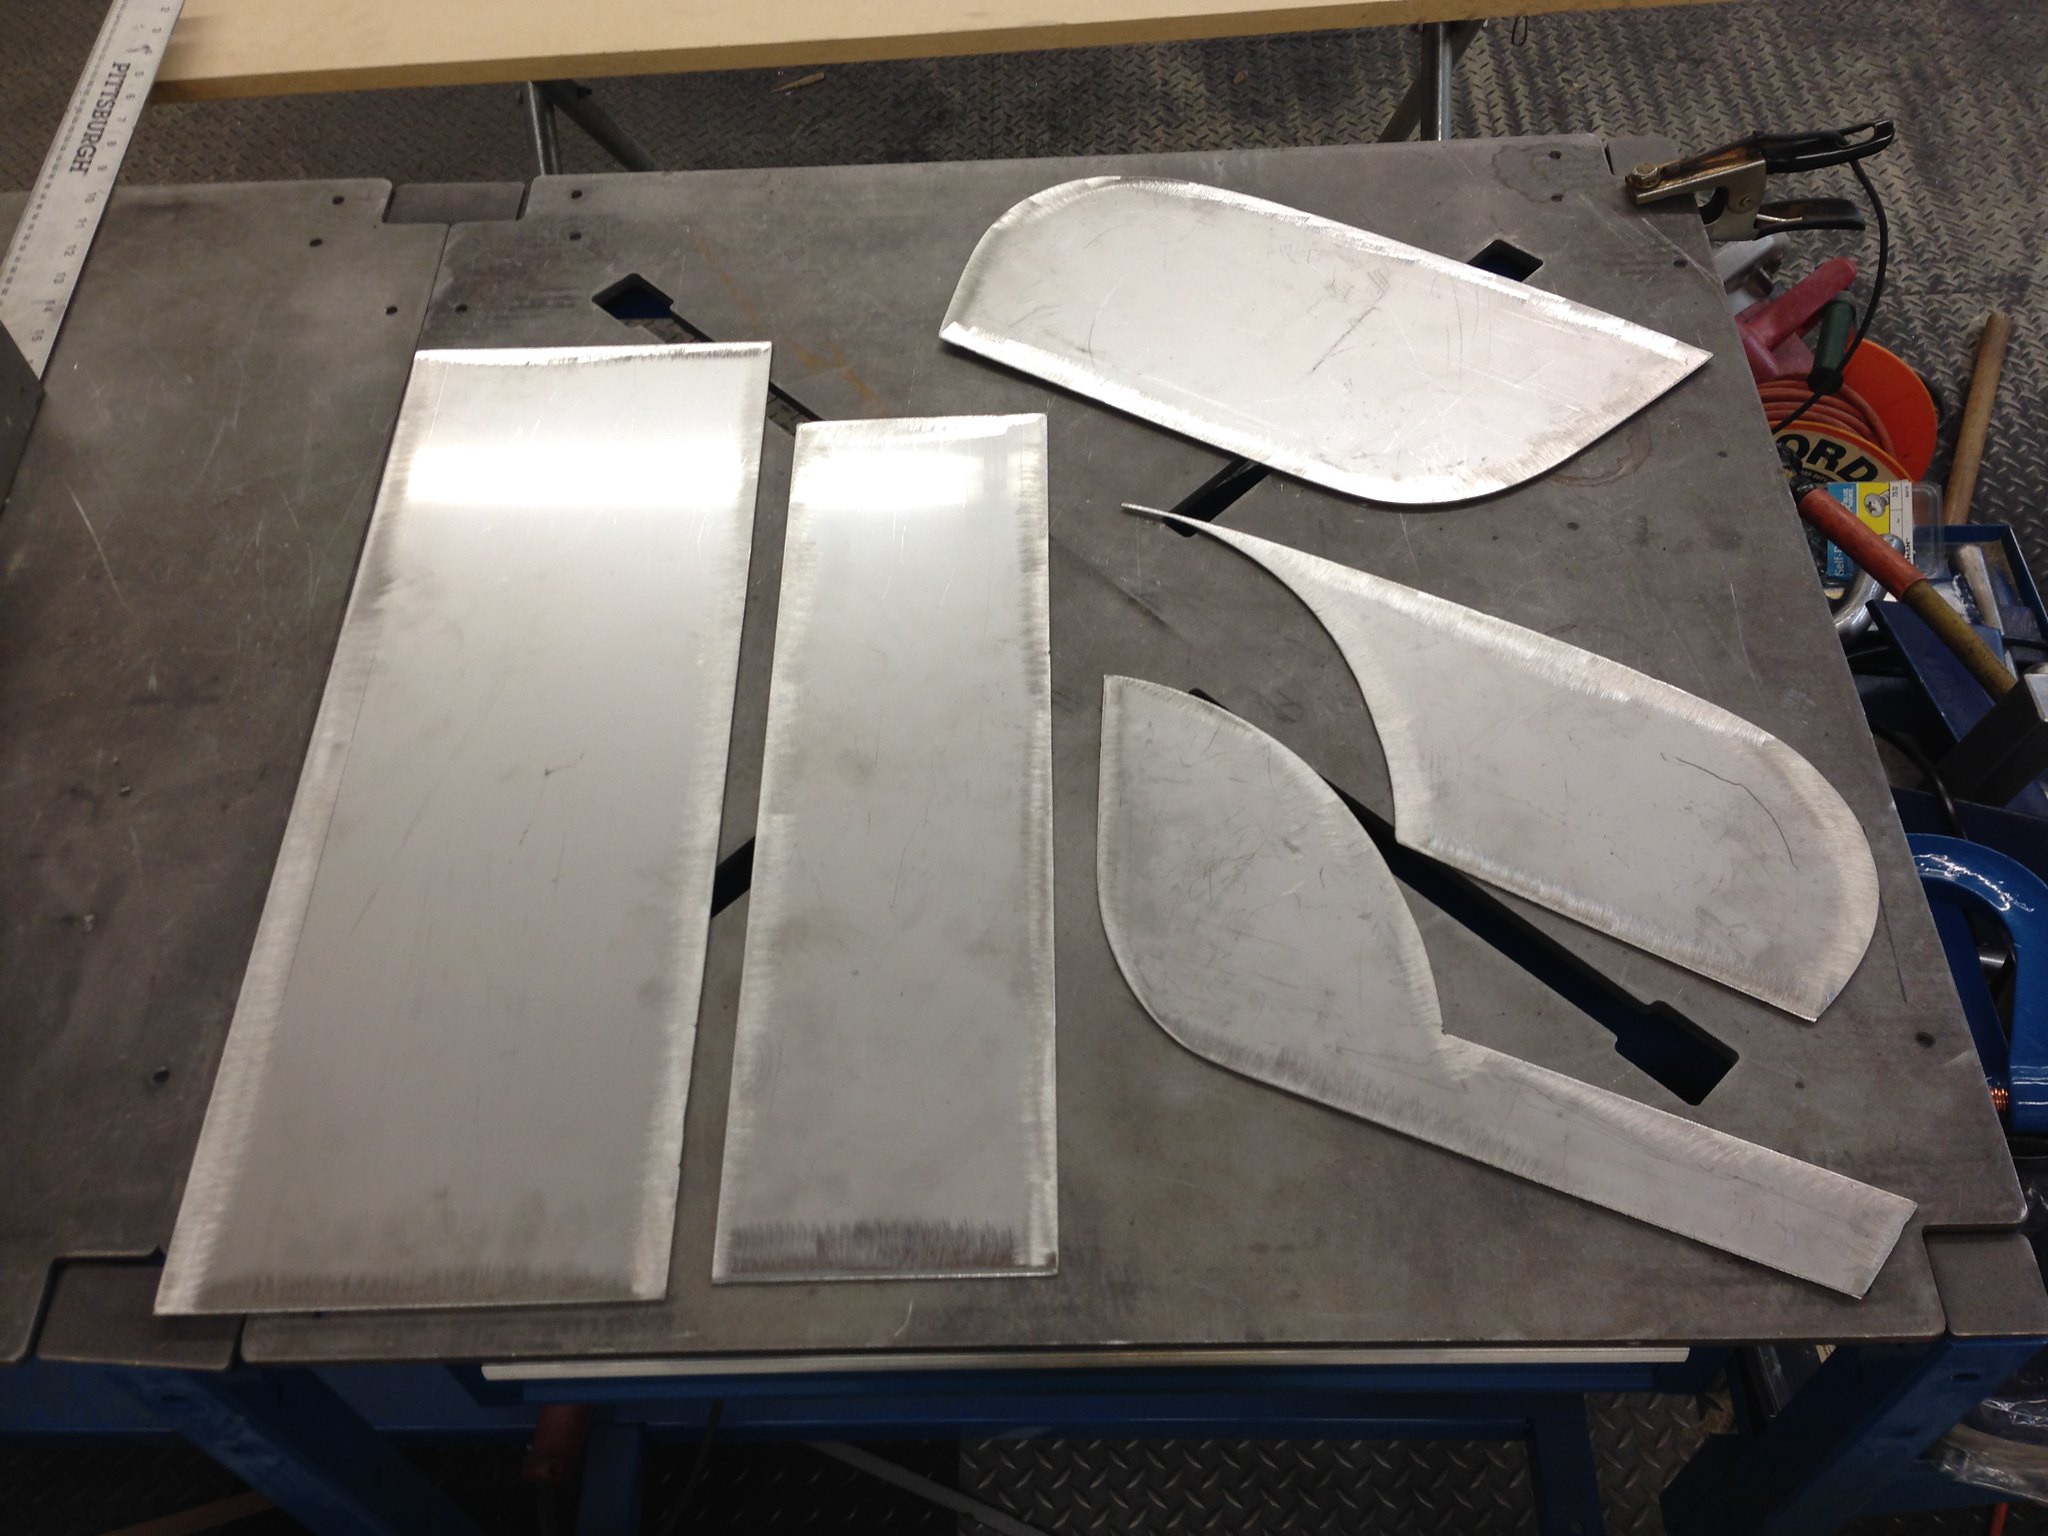 Rotax Lamby build-090
 by
PotvinV8, on Flickr
And the finished product...
 Rotax Lamby build-091
 by
PotvinV8, on Flickr
I knocked out some 5/16-inch stainless bungs that will serve to mount the tank. The recessed end will be welded to the frame while a tapped bung will be welded to the tank. Rubber snubbers in between help isolate vibration.
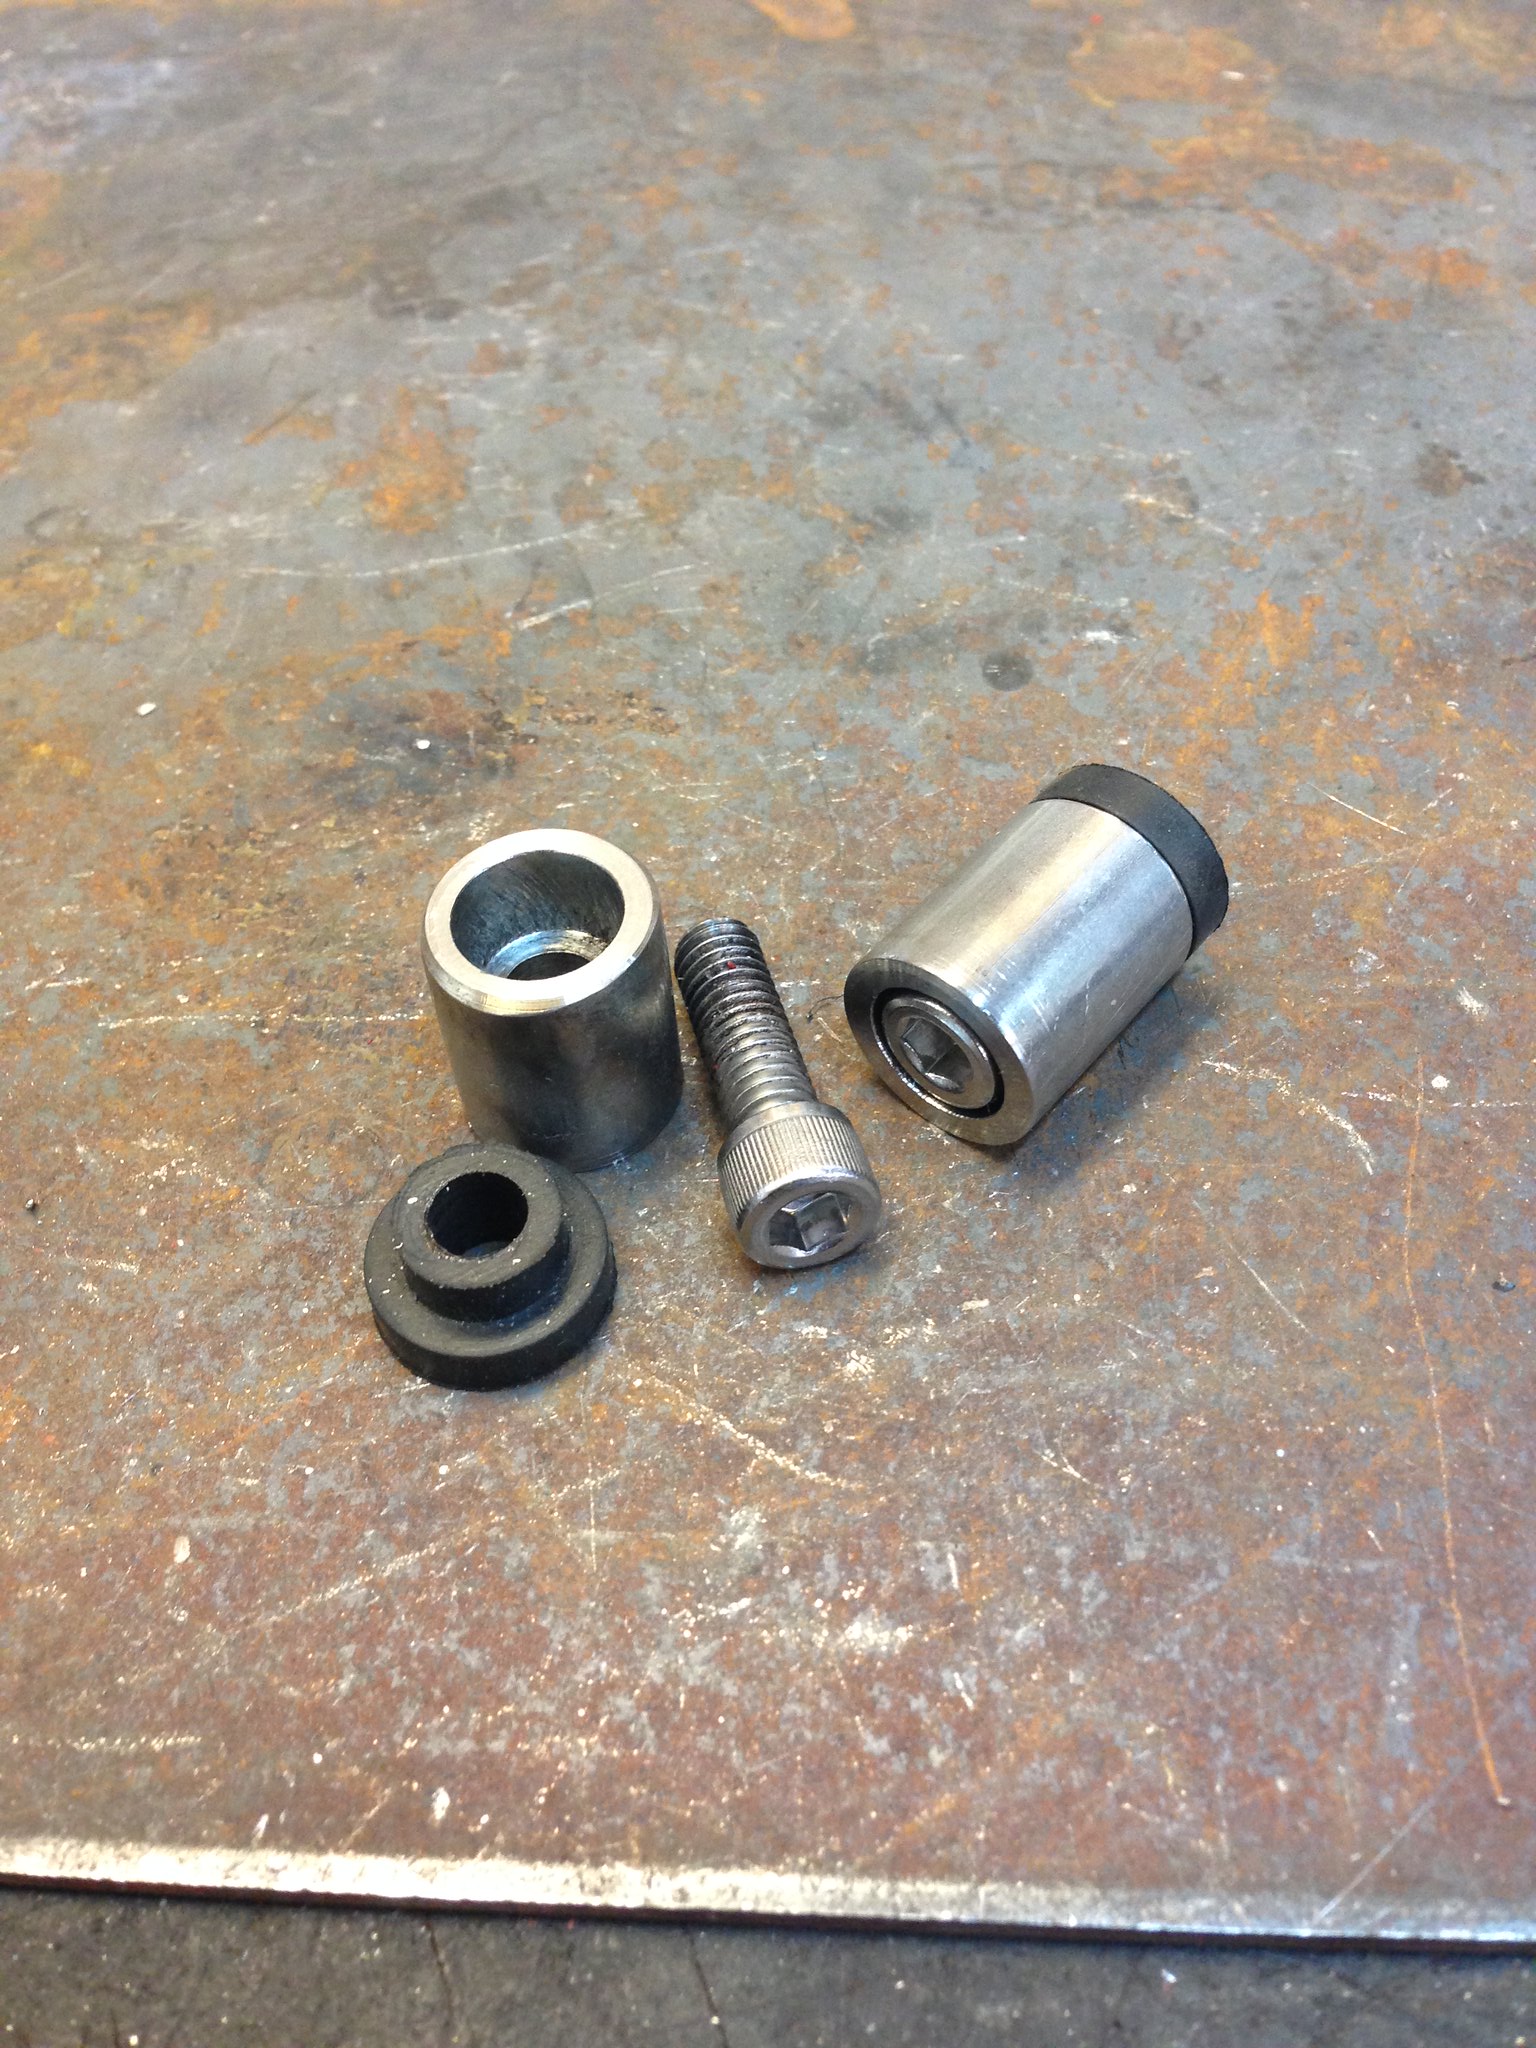 Rotax Lamby build-092
 by
PotvinV8, on Flickr
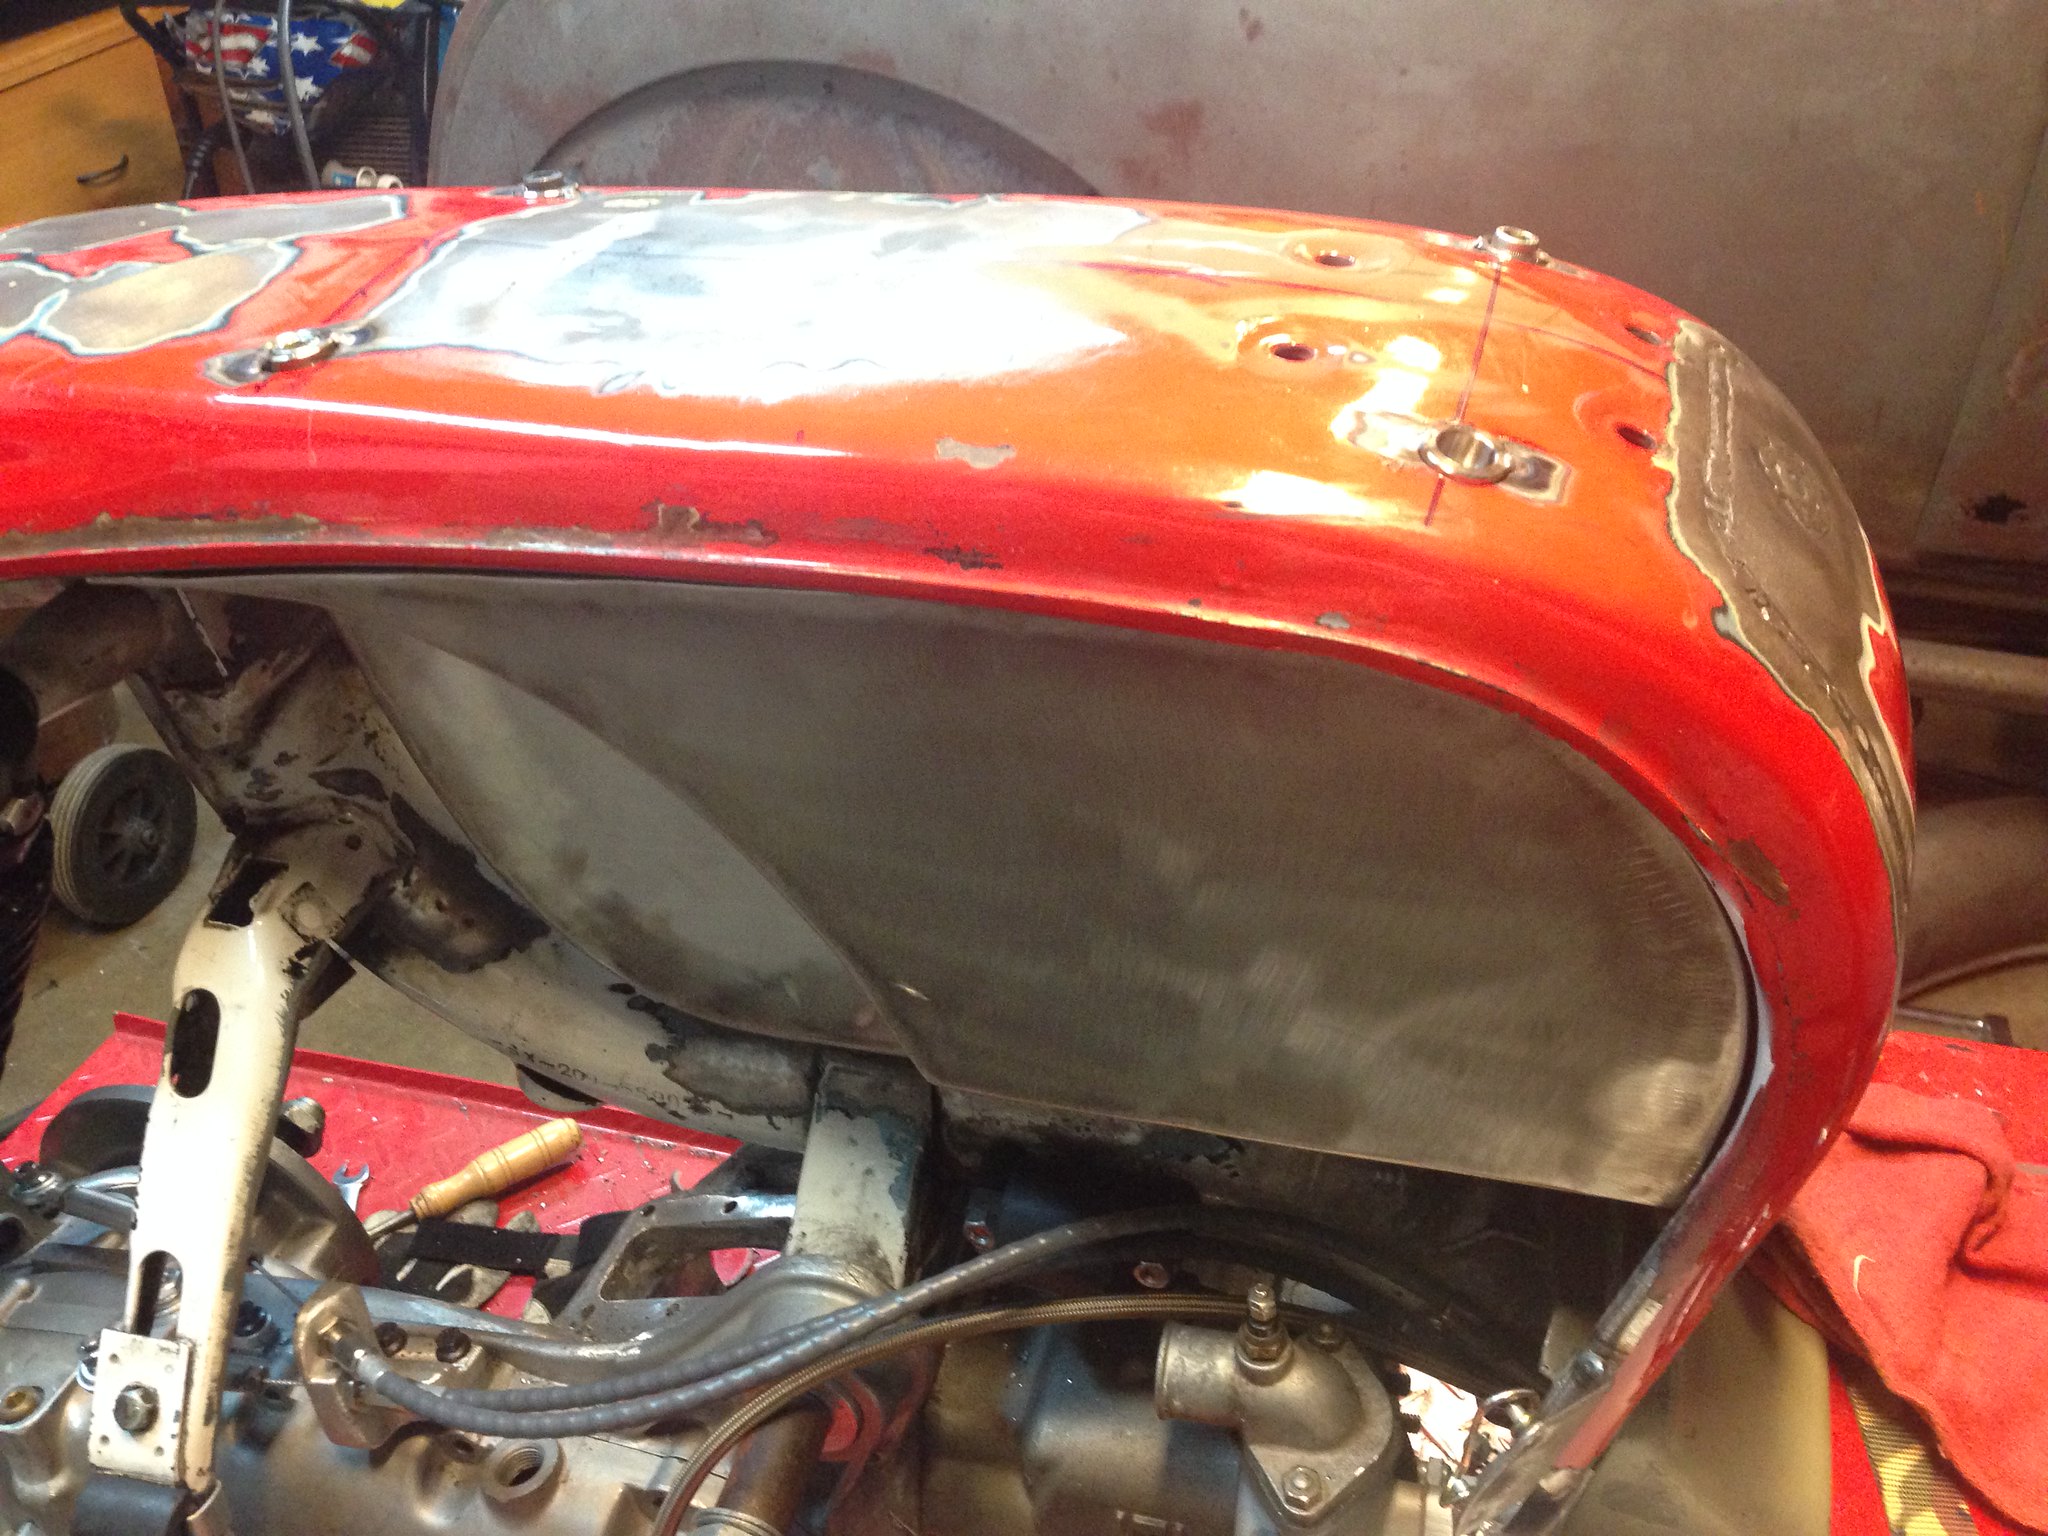
Here's a terribly blurry shot of the tank prior to installation. That big fitting is a roll-over valve for venting while the smaller valve is a return, required by the Mikuni Super BN carb. You can't see the outlets (full and reserve), but they're on the bottom of the tank at different heights. These will run separately to the aforementioned valve so that a reserve function is still possible. You can also see the threaded bungs tack welded to the top of the tank. After finish welding, I'm going to add a welded strap that will straddle the tank across the bung's location to provide more "meat" for the mounts, hopefully preventing the bungs from tearing away from the tank.
 Rotax Lamby build-093
 by
PotvinV8, on Flickr
And the whole ball o' wax installed...
 Rotax Lamby build-094
 by
PotvinV8, on Flickr
Re: Rotax 300 builld
Posted: Sun Oct 19, 2014 5:59 am
by RManson
I'm using a pop-up cap for the filler, accessed under the seat.
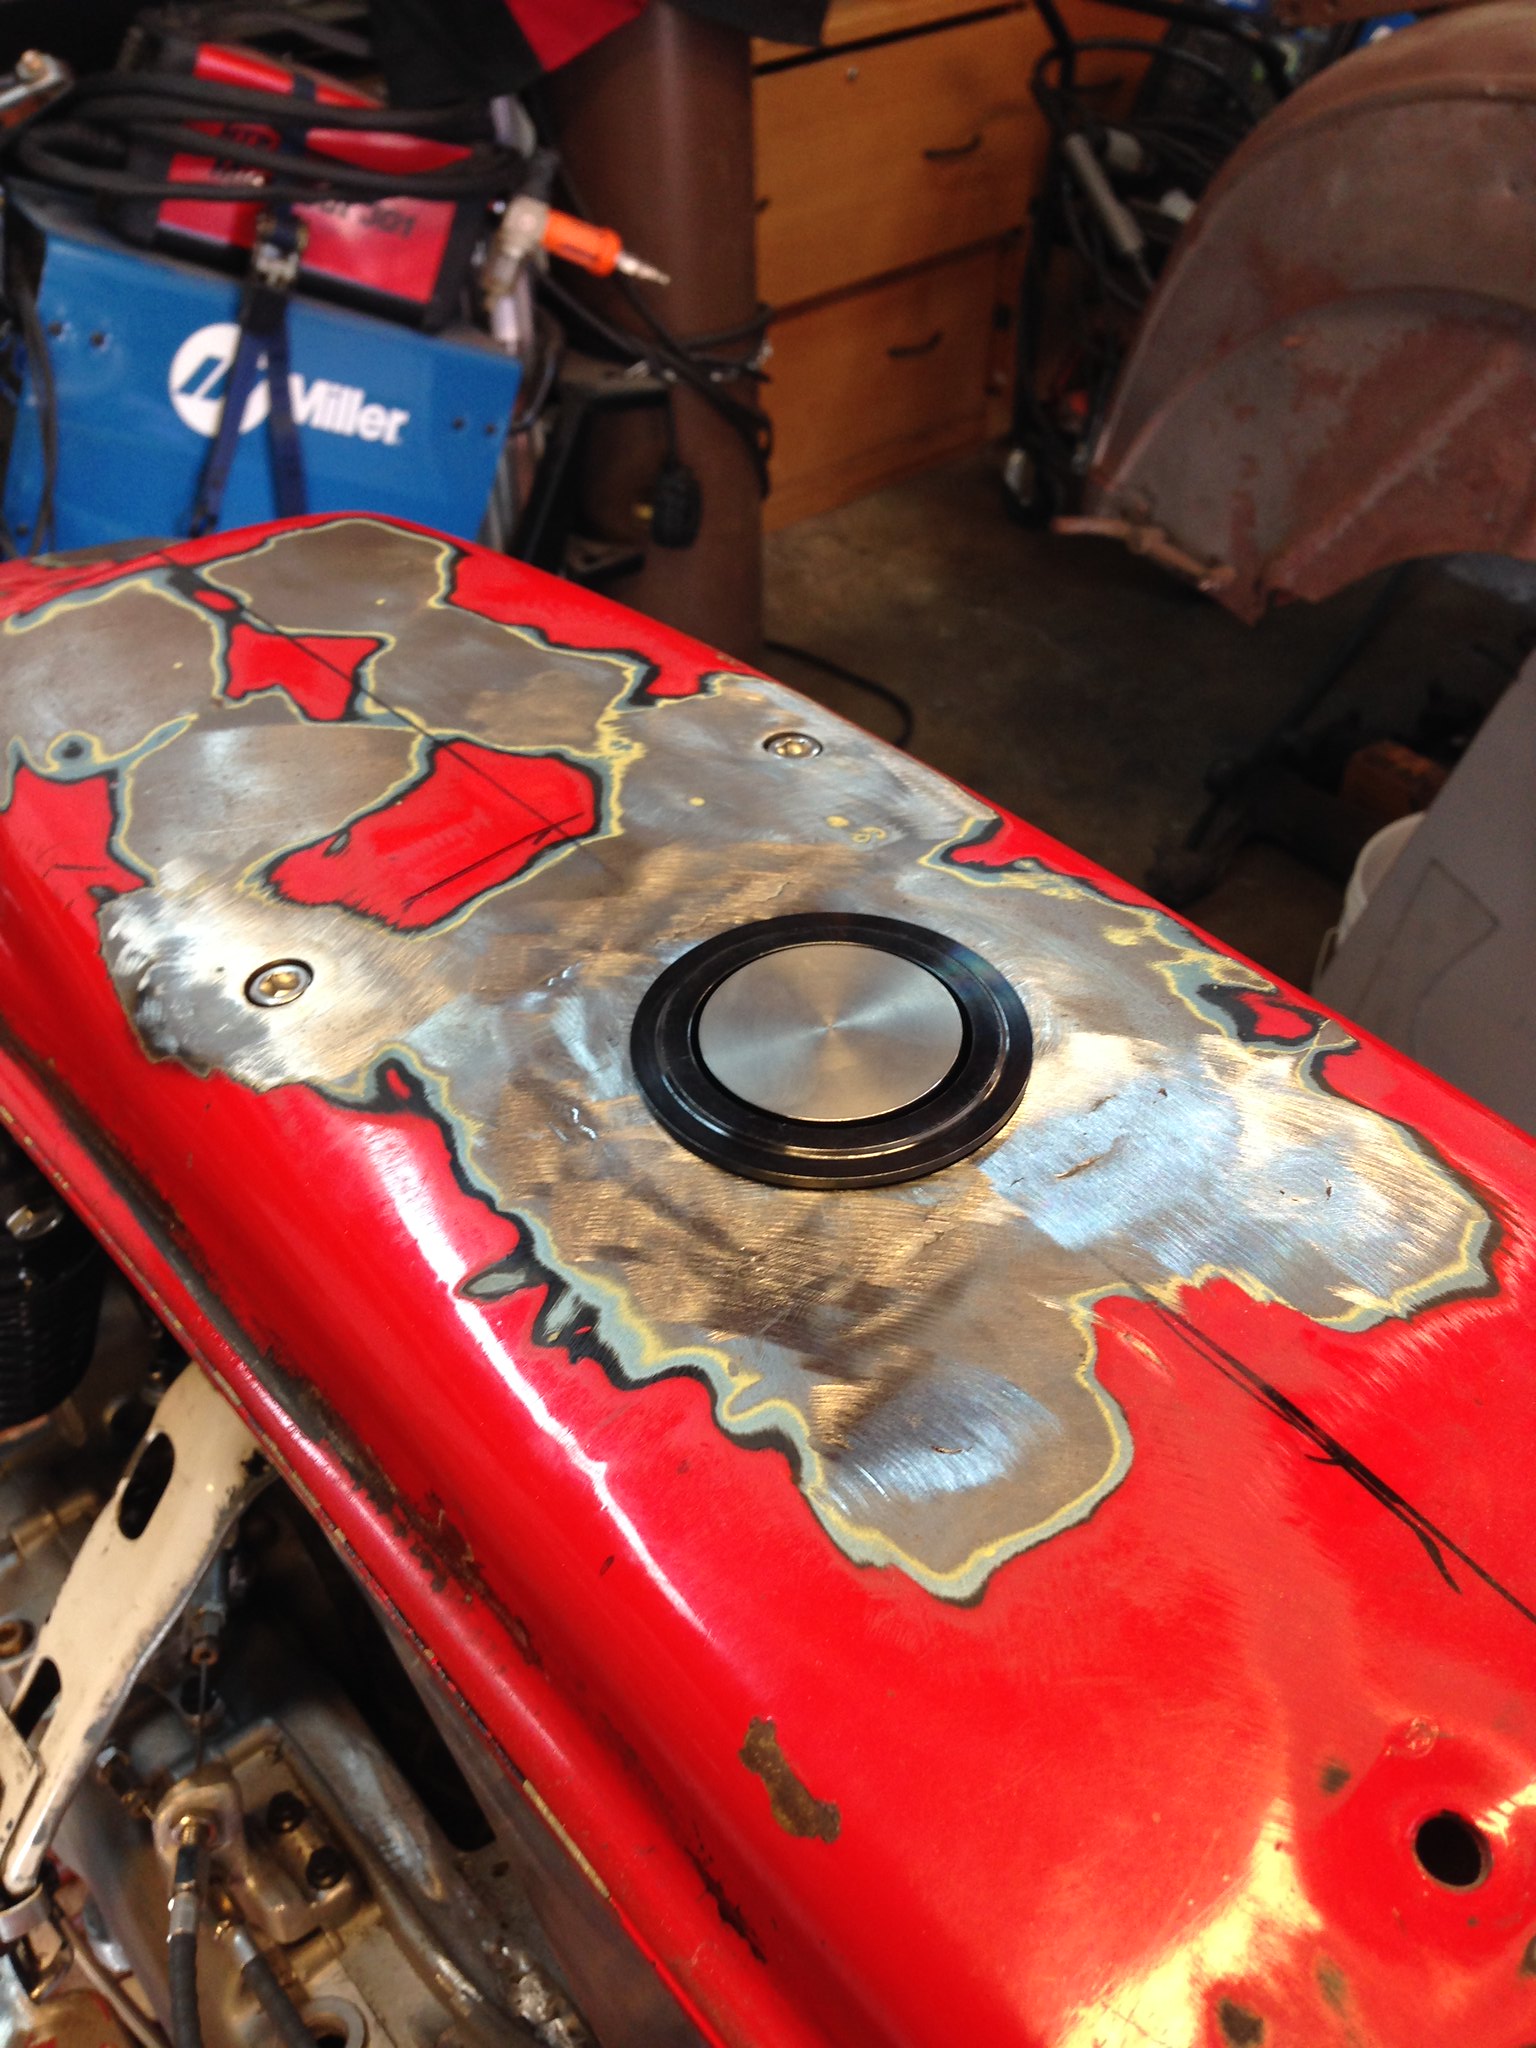 Rotax Lamby build-095
 by
PotvinV8, on Flickr
A quarter-turn of the center cap causes it to spring up...
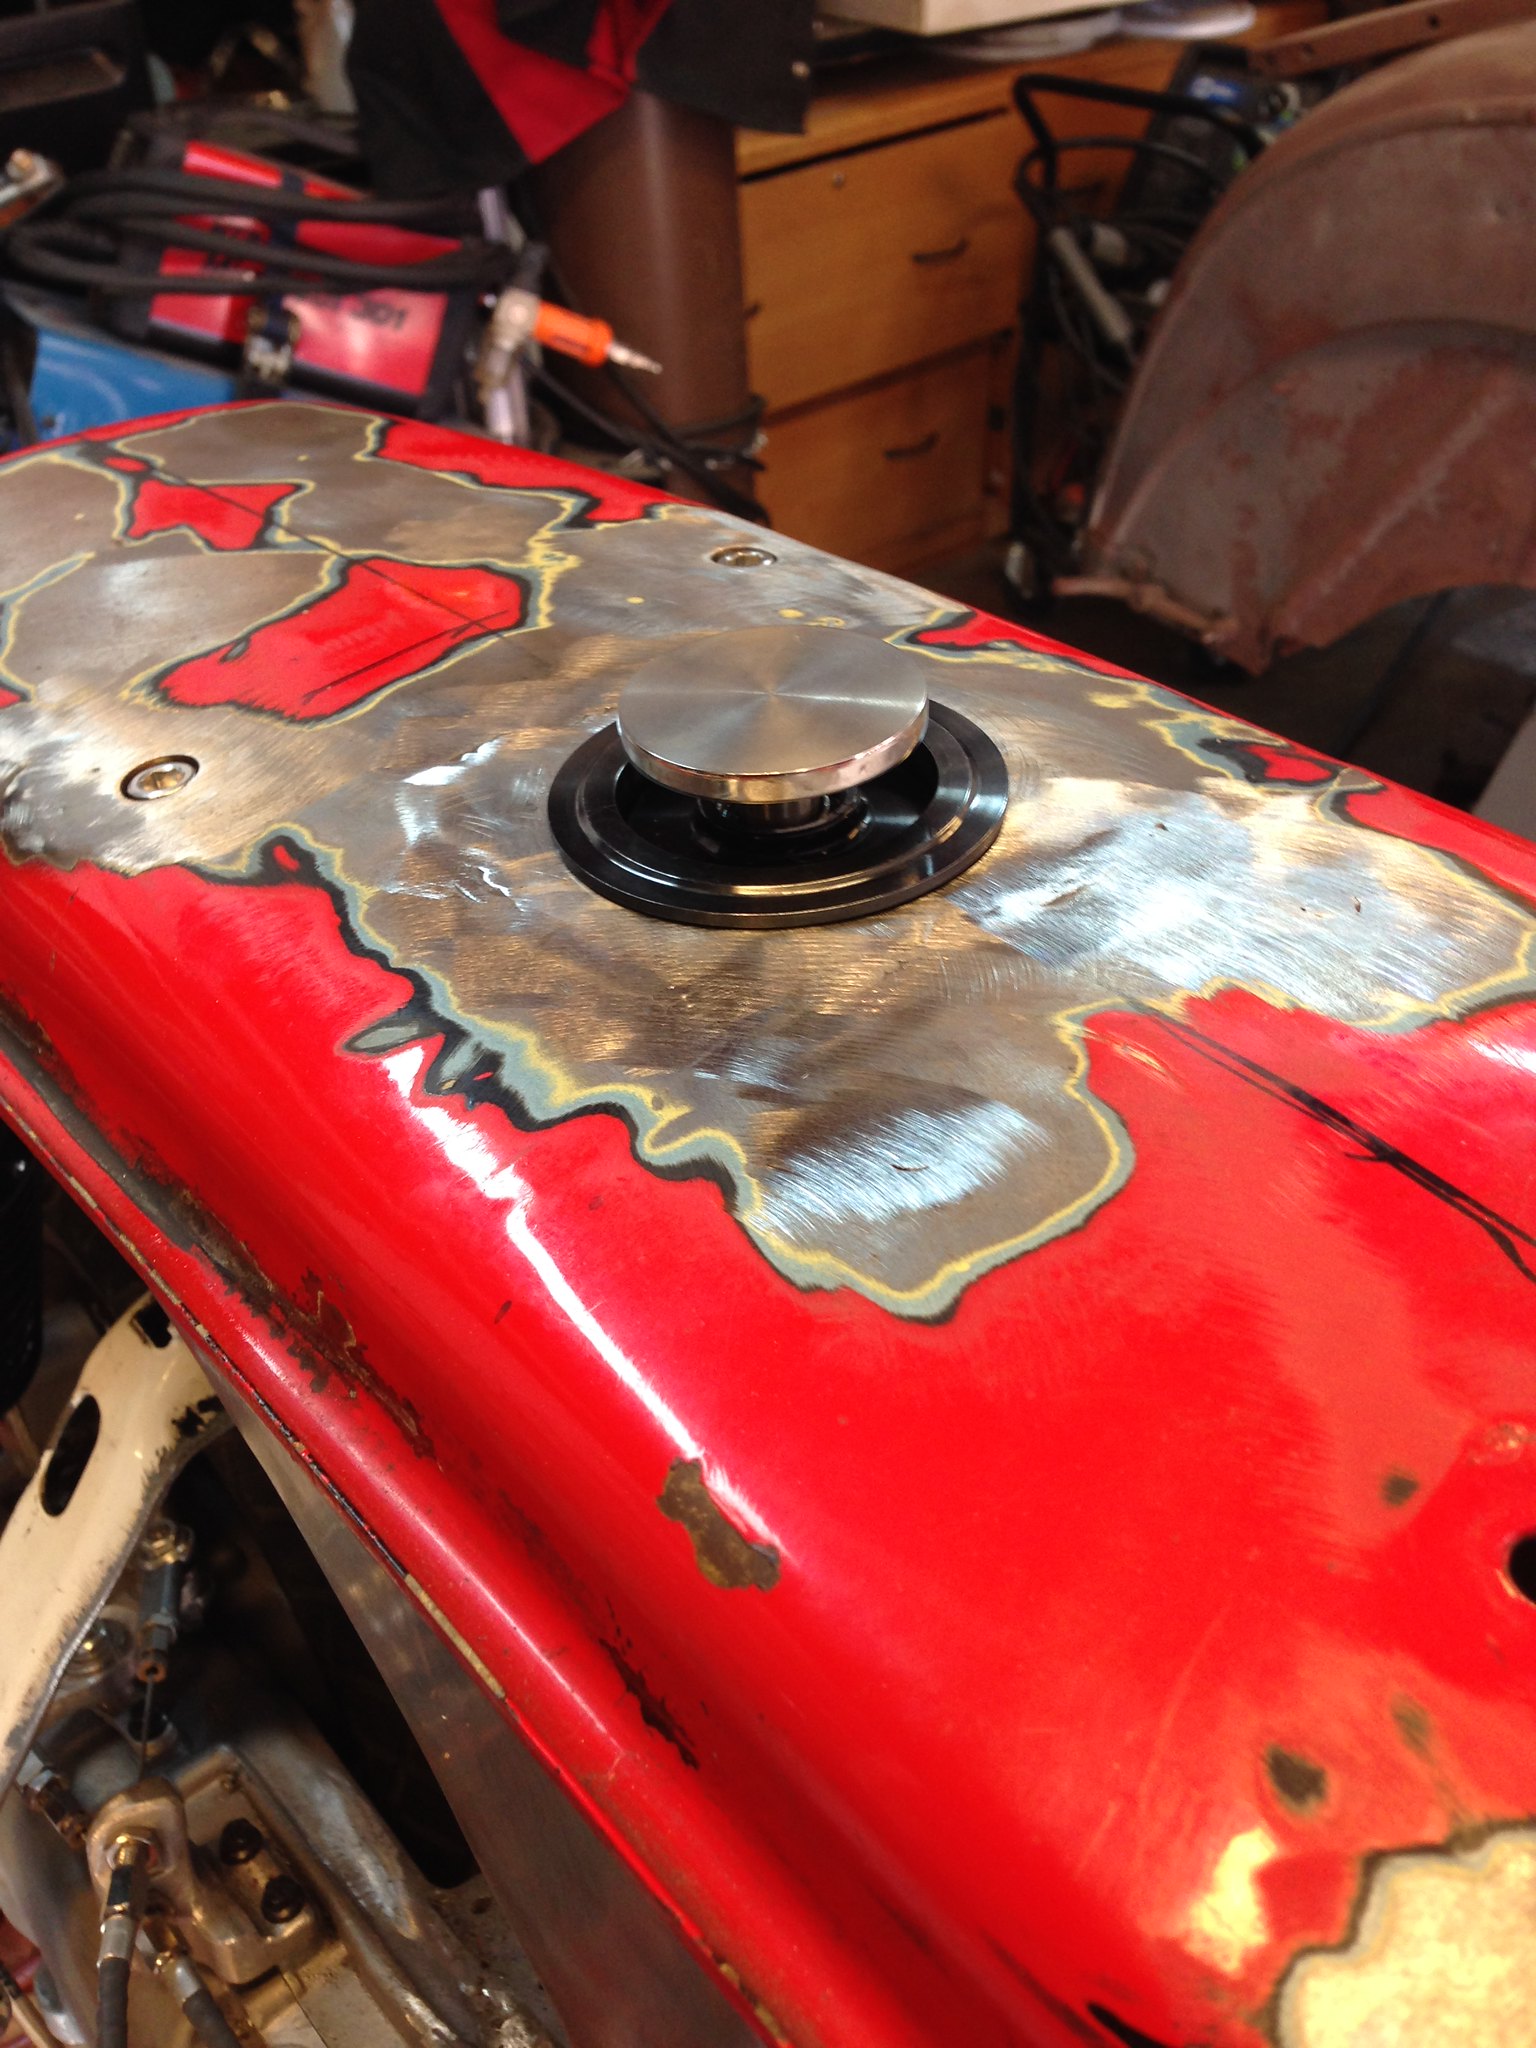 Rotax Lamby build-096
 by
PotvinV8, on Flickr
Where it can then be unscrewed from the bung.
 Rotax Lamby build-097
 by
PotvinV8, on Flickr
Re: Rotax 300 builld
Posted: Sun Oct 19, 2014 6:22 am
by RManson
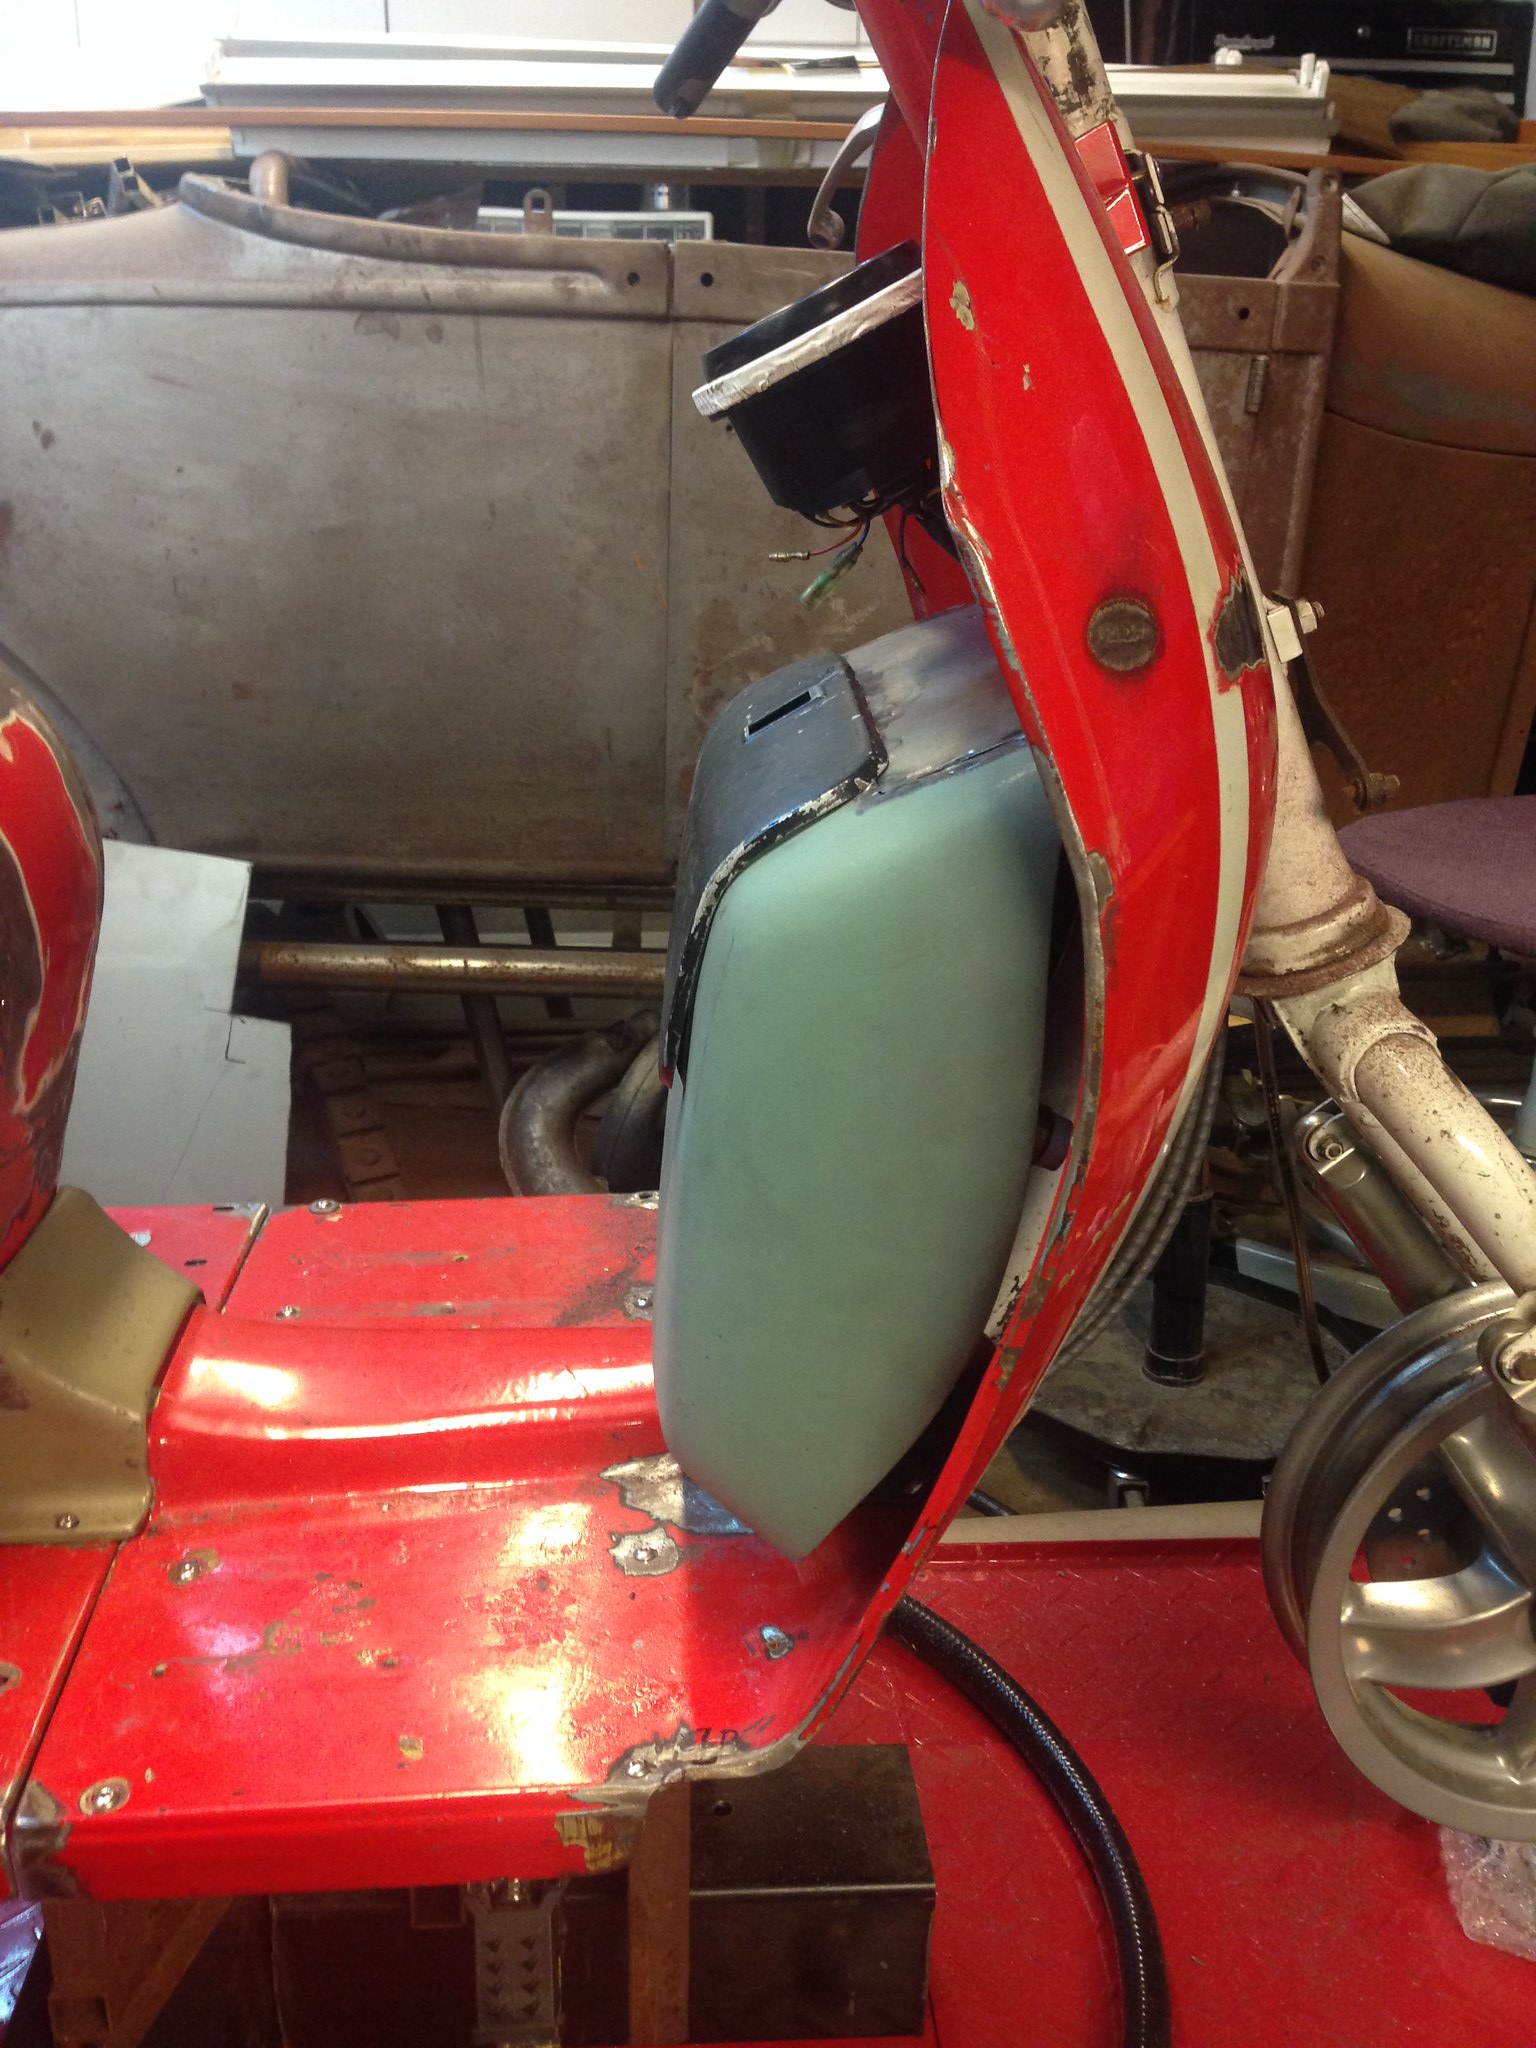
I wanted to retain as much of the original Lambretta character as possible and that meant to me that the radiator needed to be downplayed somehow. In the back of my mind, this meant wrapping the whole business in some type of shroud. Enter one clapped out Rally 200 glovebox. It obviously needs to be modified to cover the radiator and fan, but it looks like it will work.
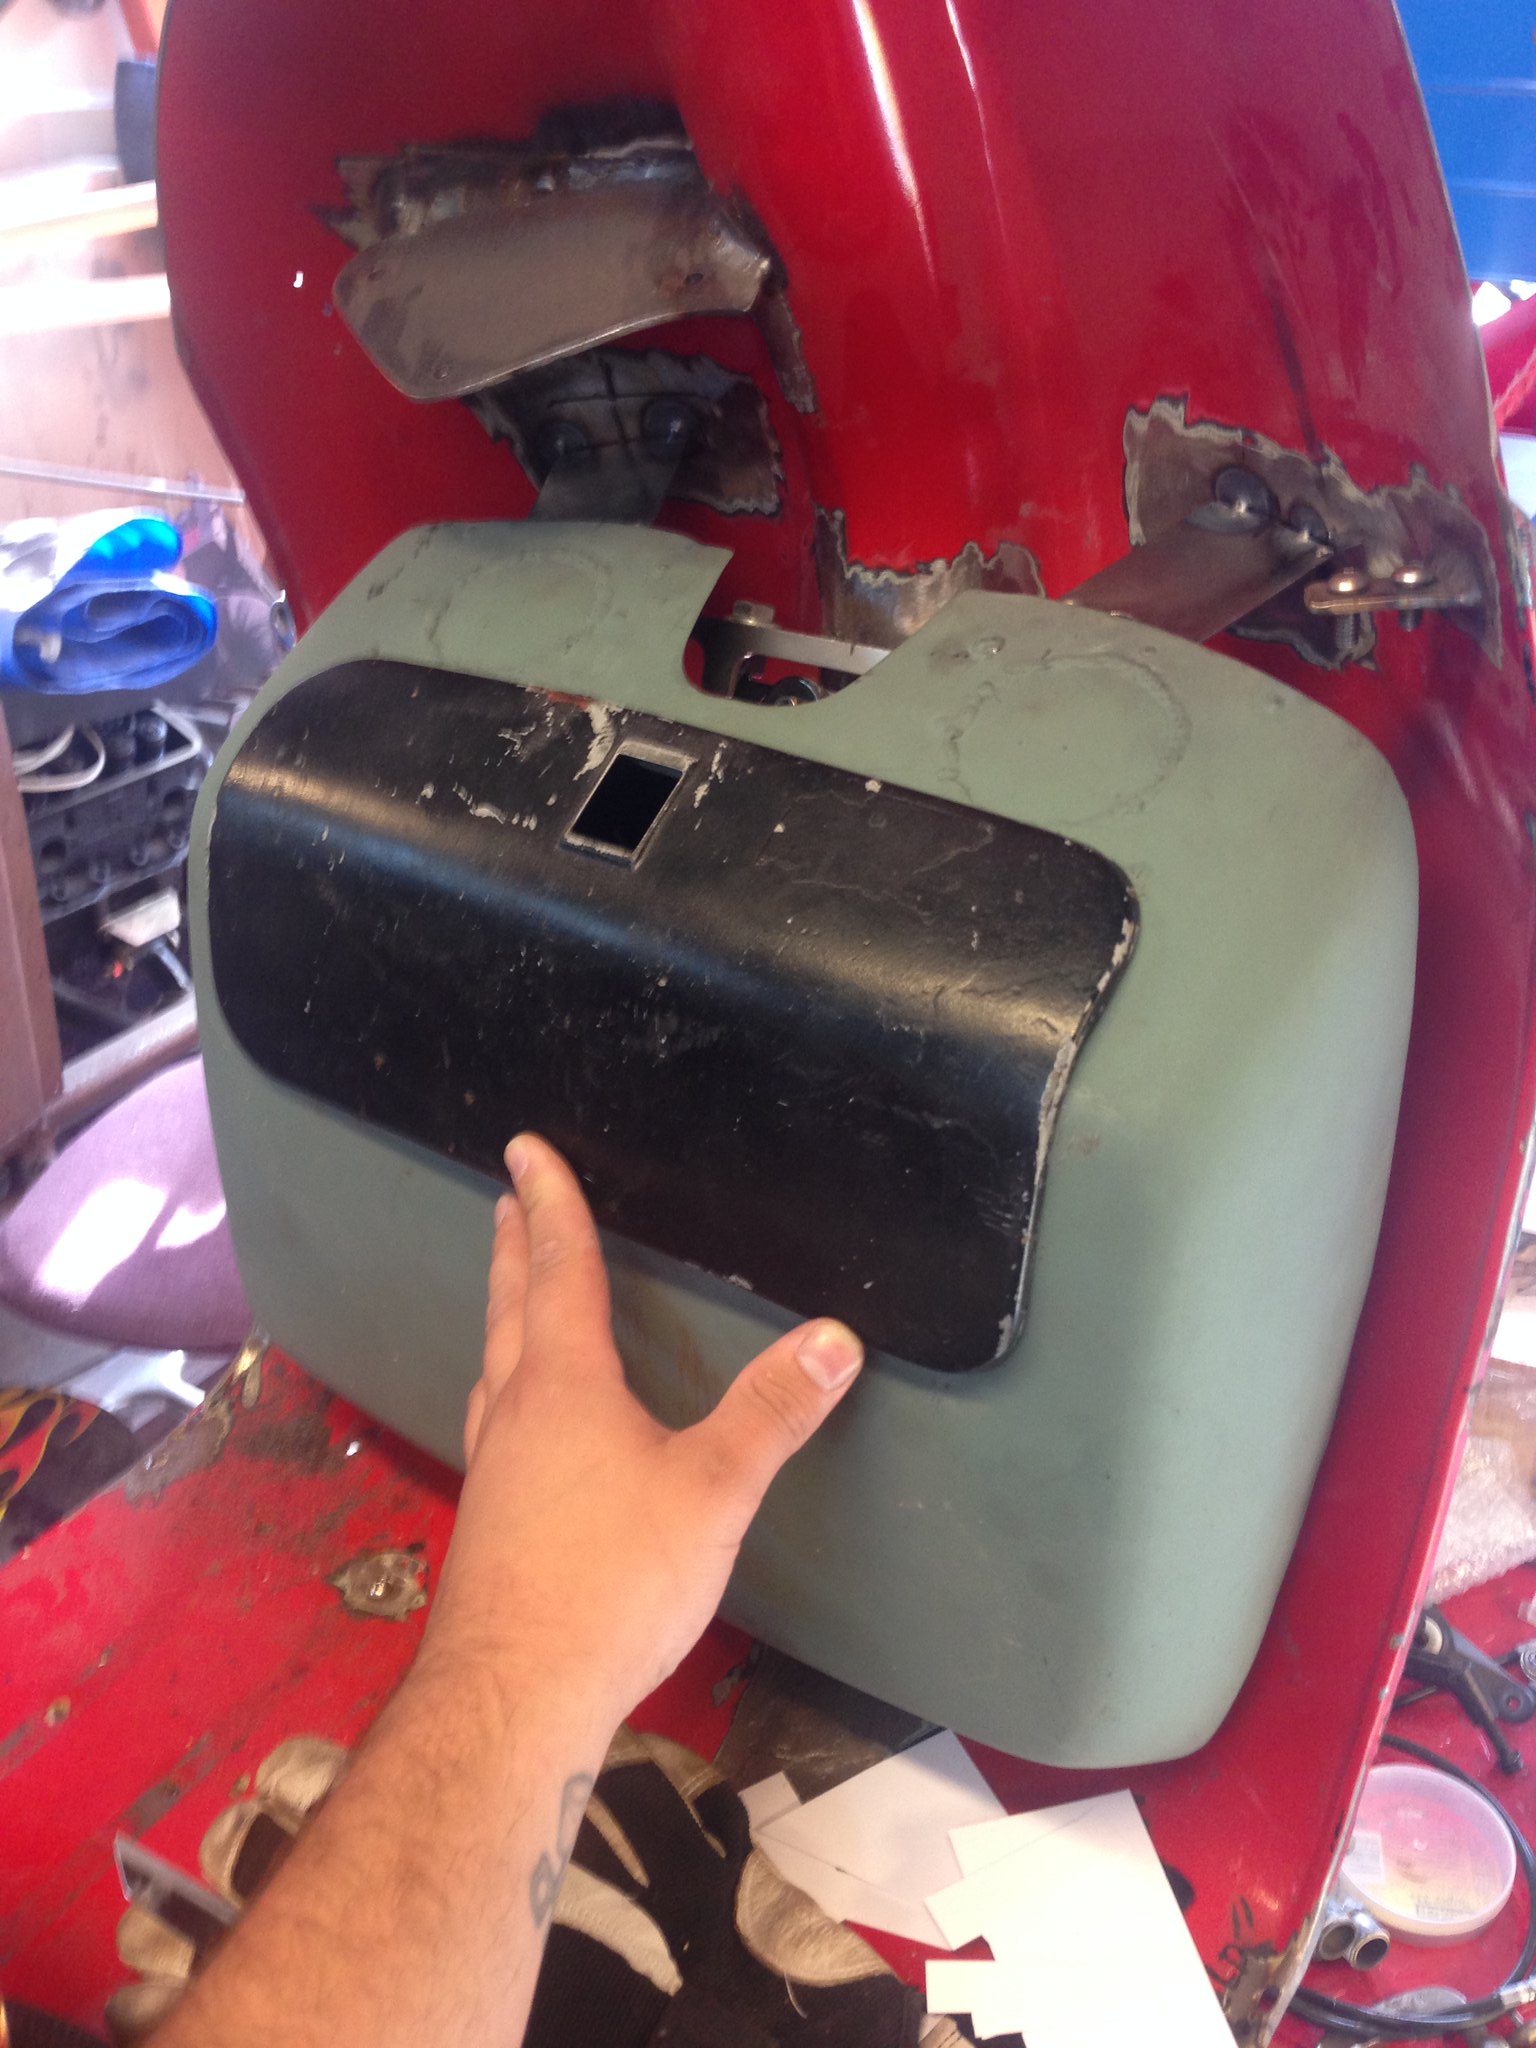 Rotax Lamby build-098
 by
PotvinV8, on Flickr
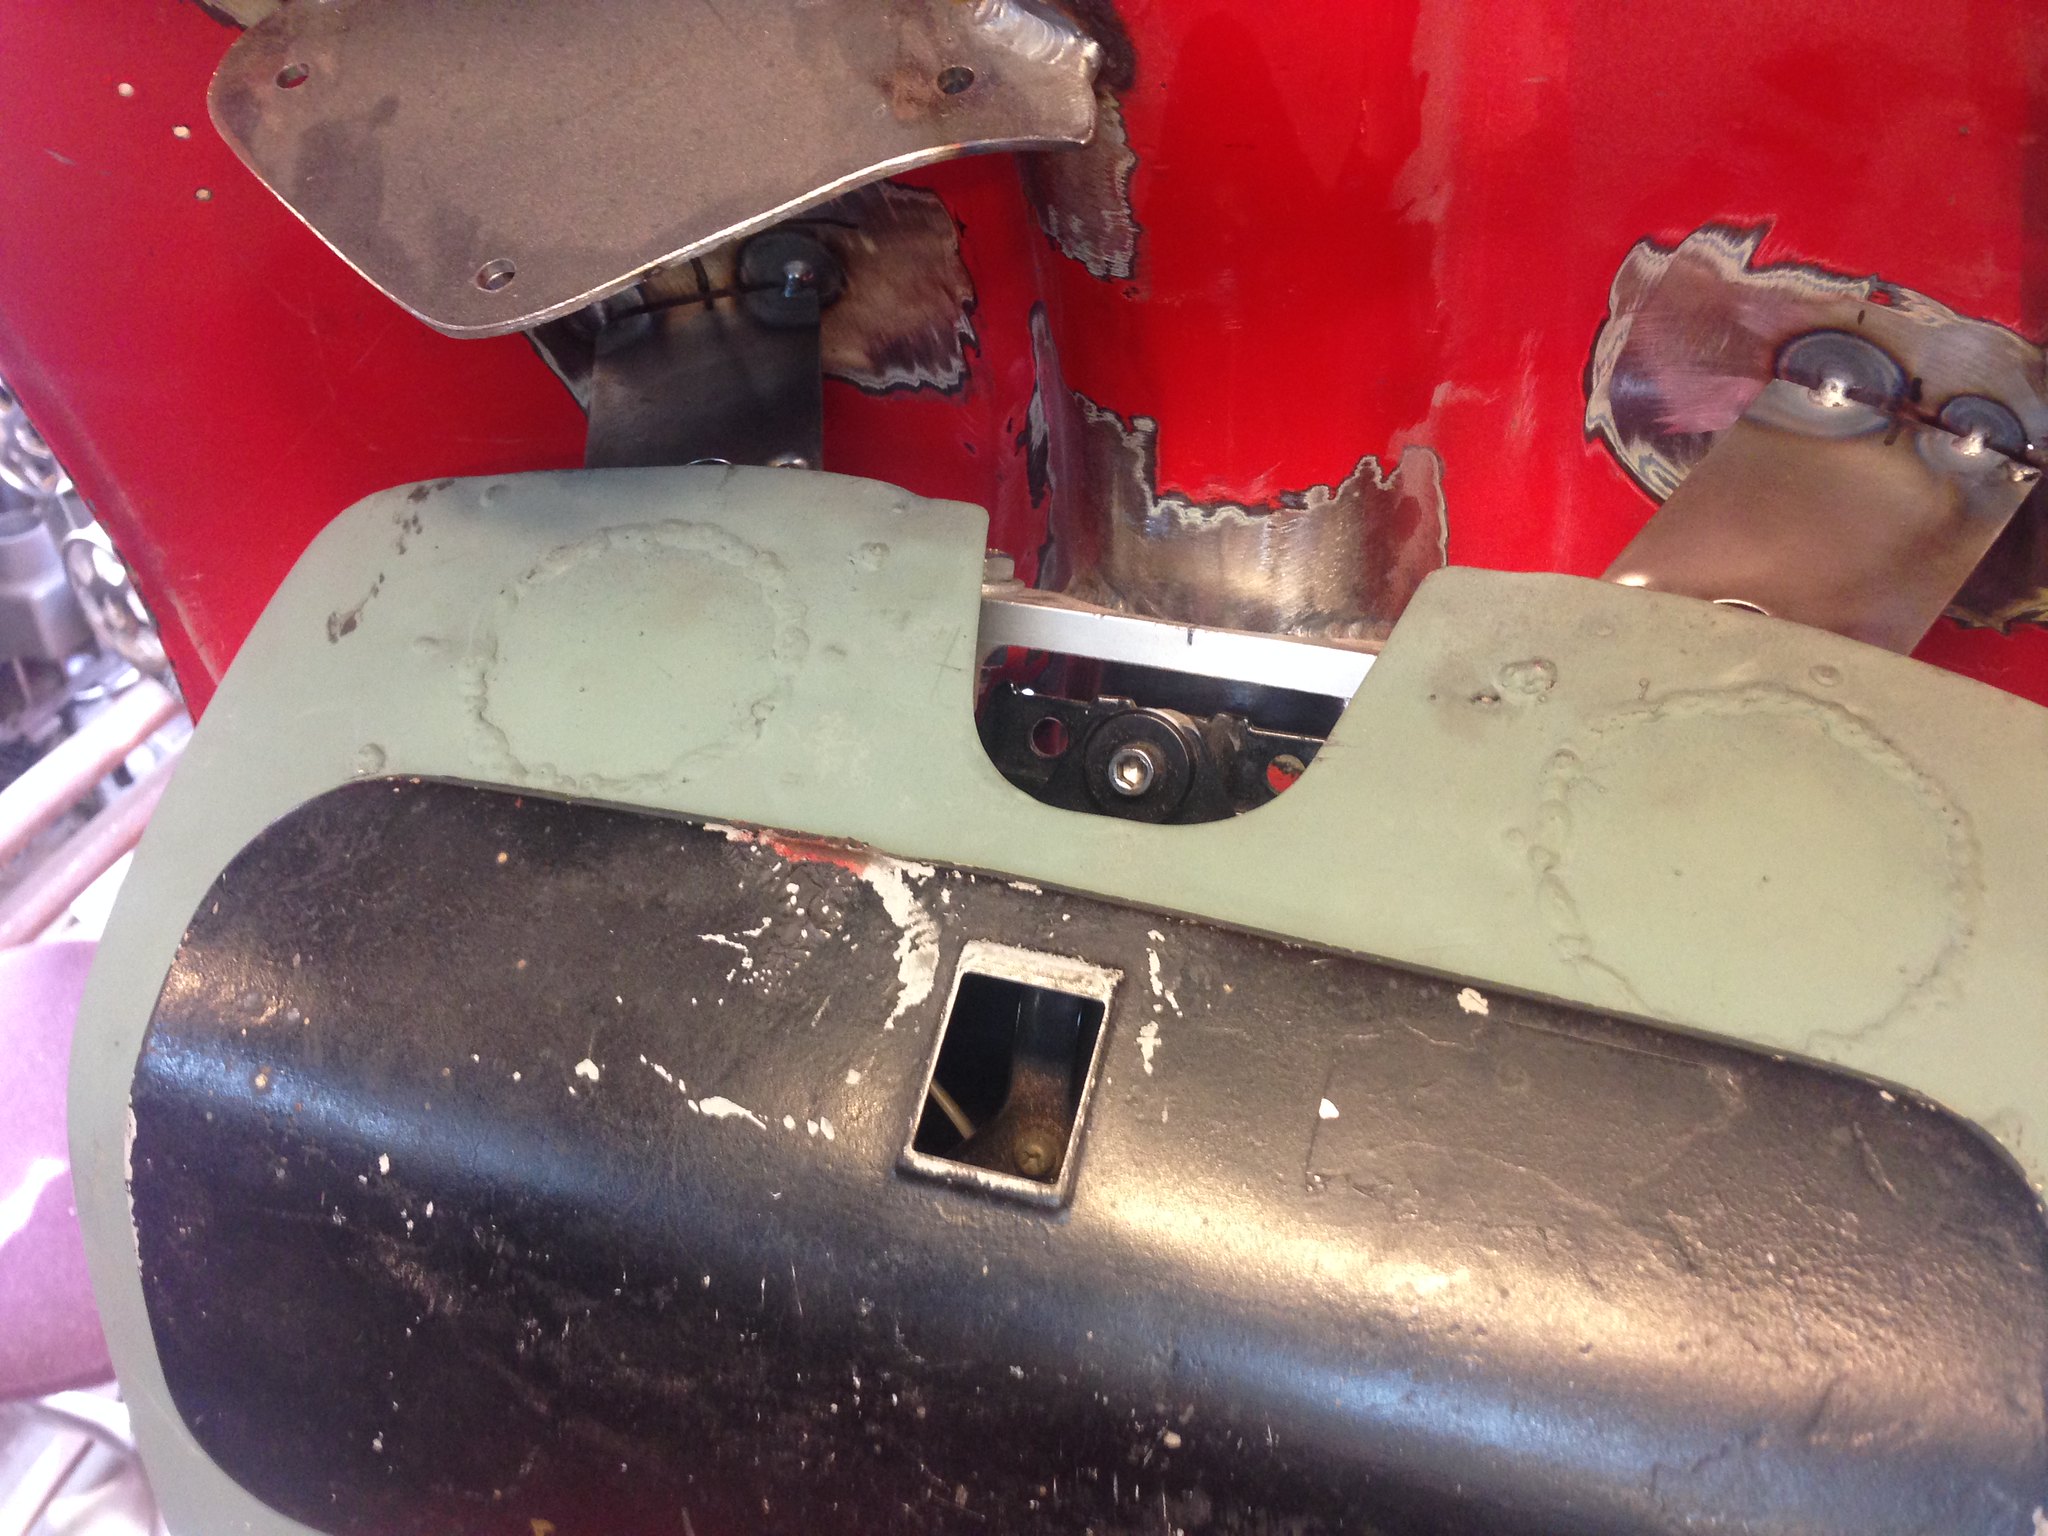
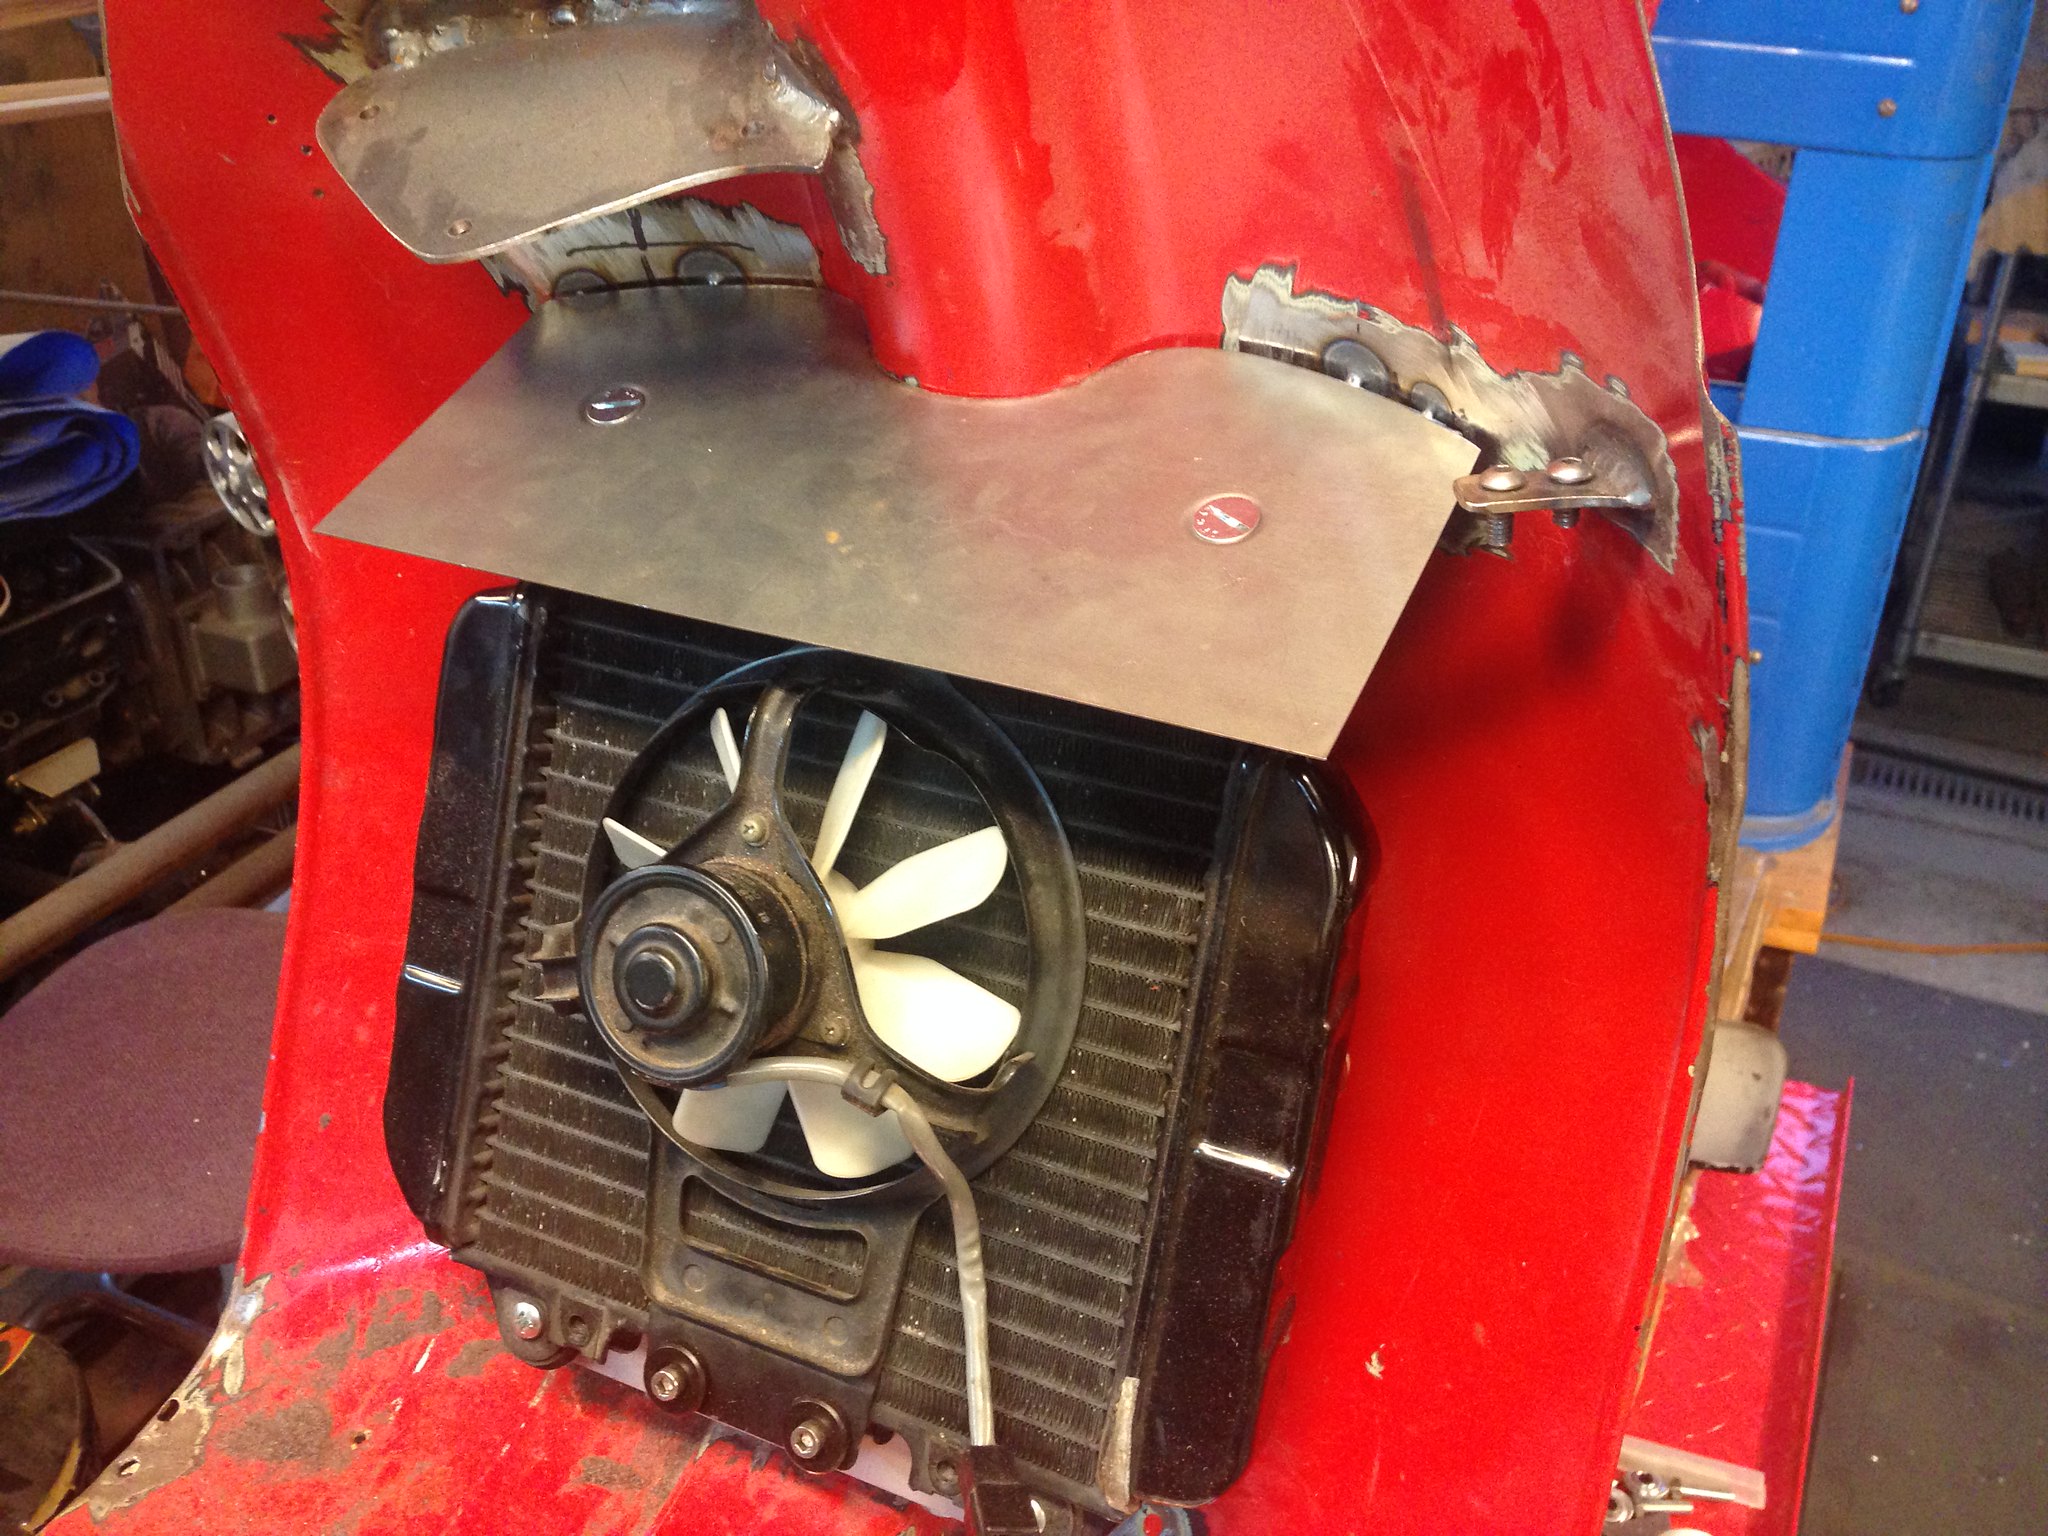
The first step was to tack weld two Dzus tabs to the legshields to provide support to the top panel. At this point, we can see how much material needs to be added to the glovebox in order to cover the radiator.
 Rotax Lamby build-099
 by
PotvinV8, on Flickr
To make the patch panel, first I made a template using construction paper.
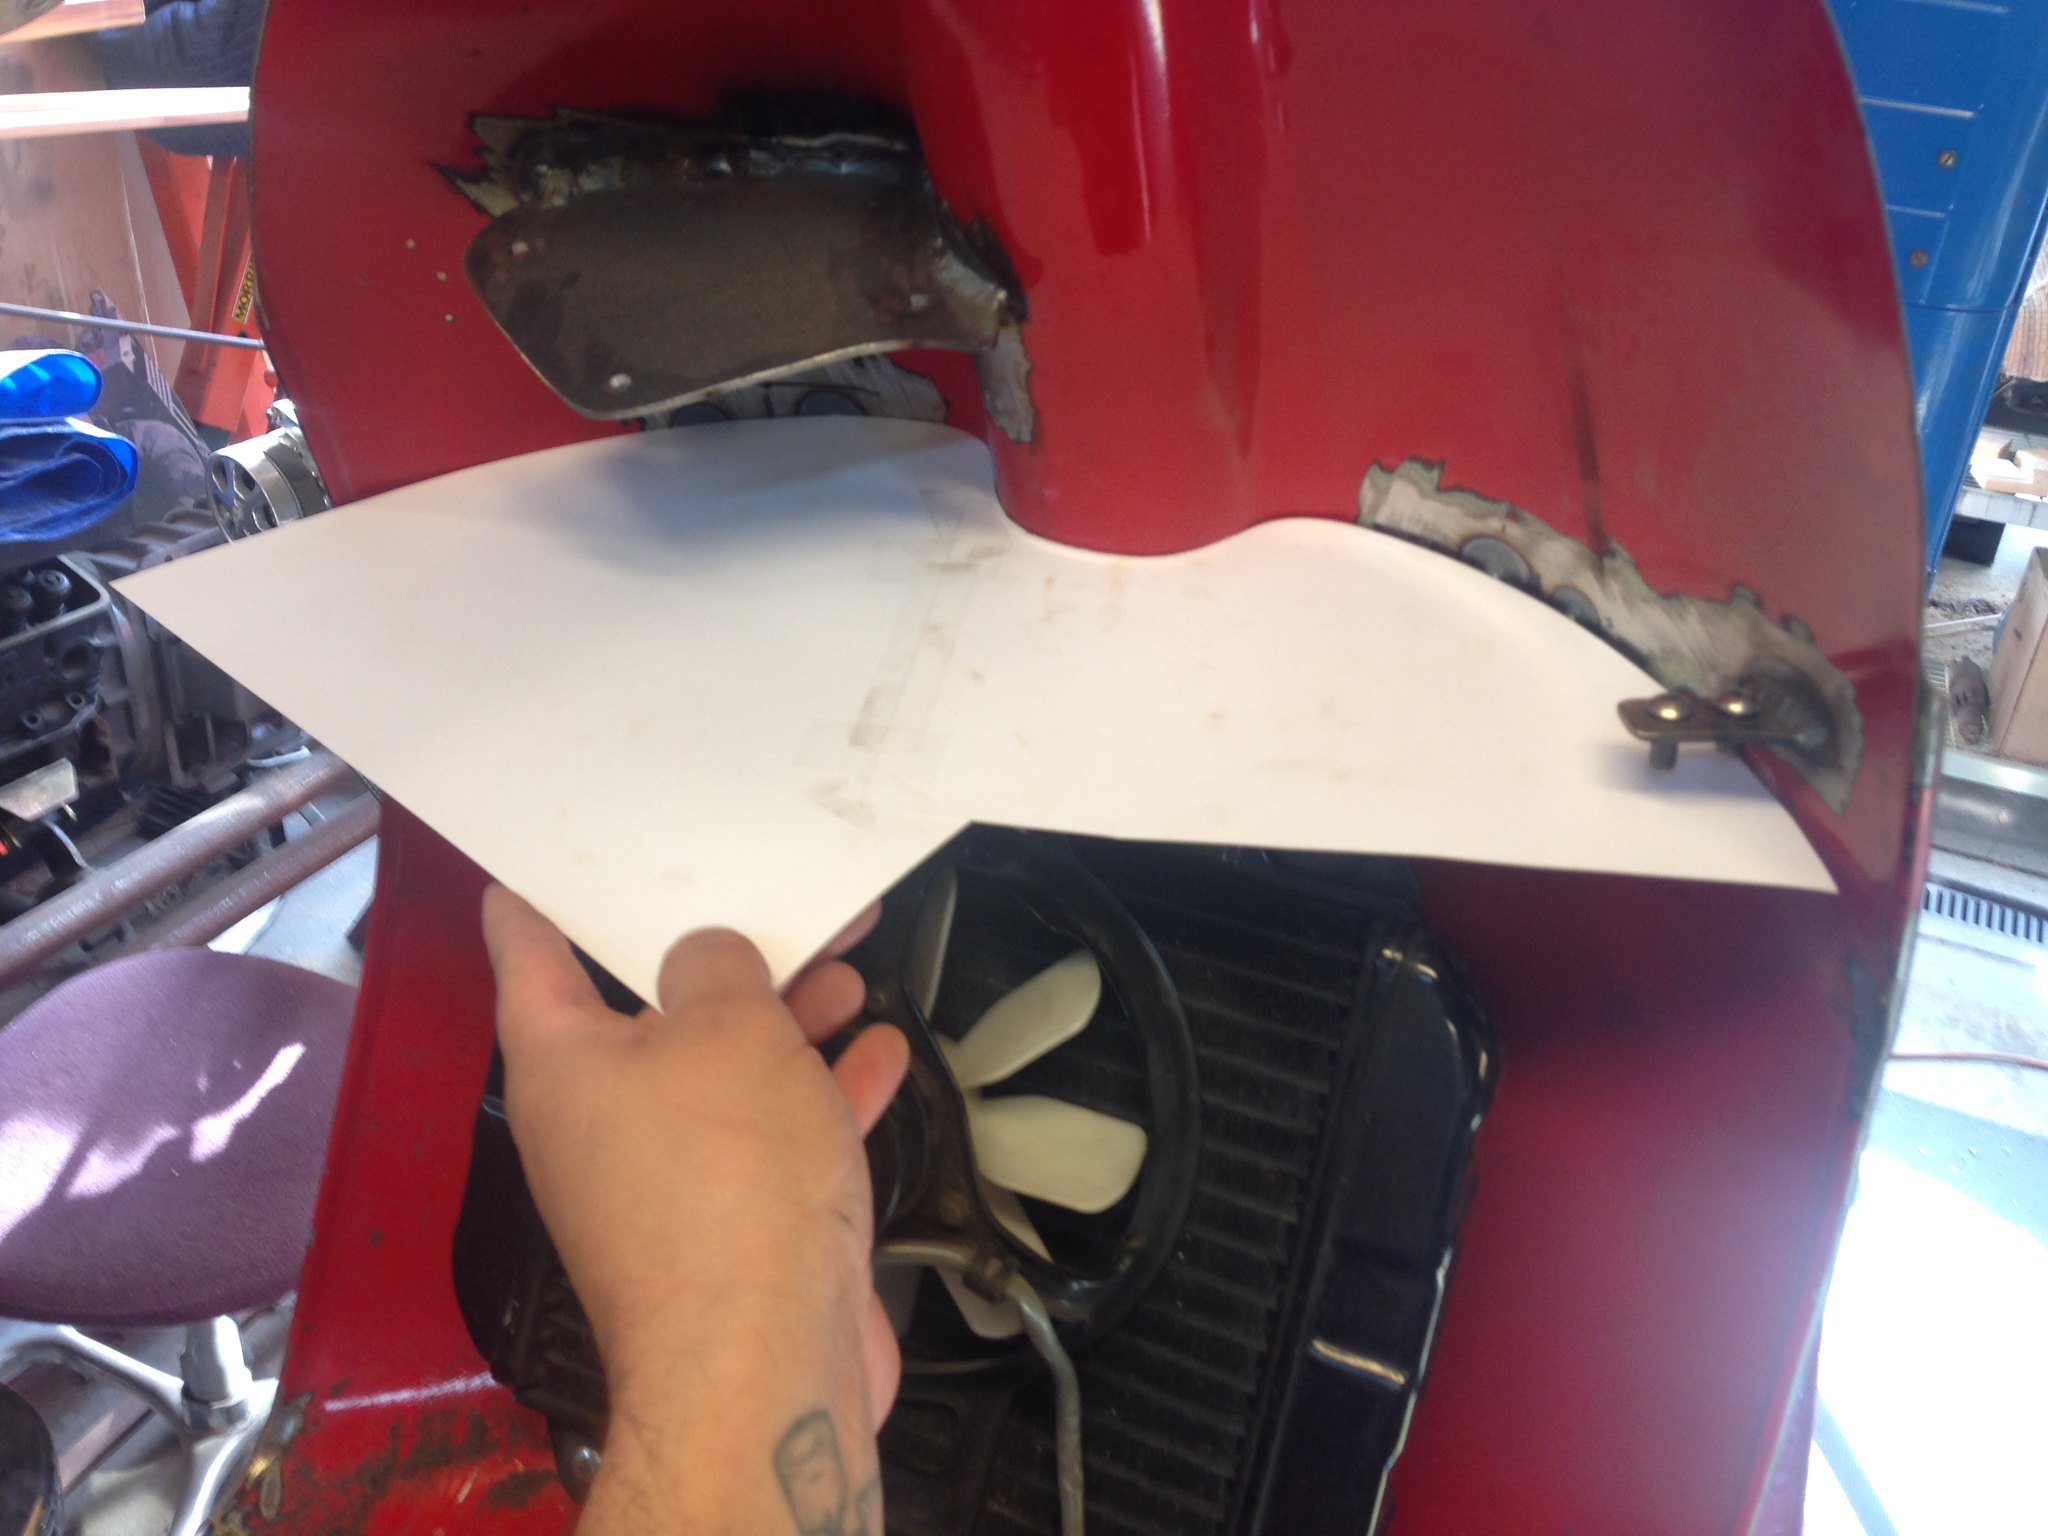 Rotax Lamby build-100
 by
PotvinV8, on Flickr
Once I was pleased with the fit of the template, I translated the Dzus button locations.
 Rotax Lamby build-101
 by
PotvinV8, on Flickr
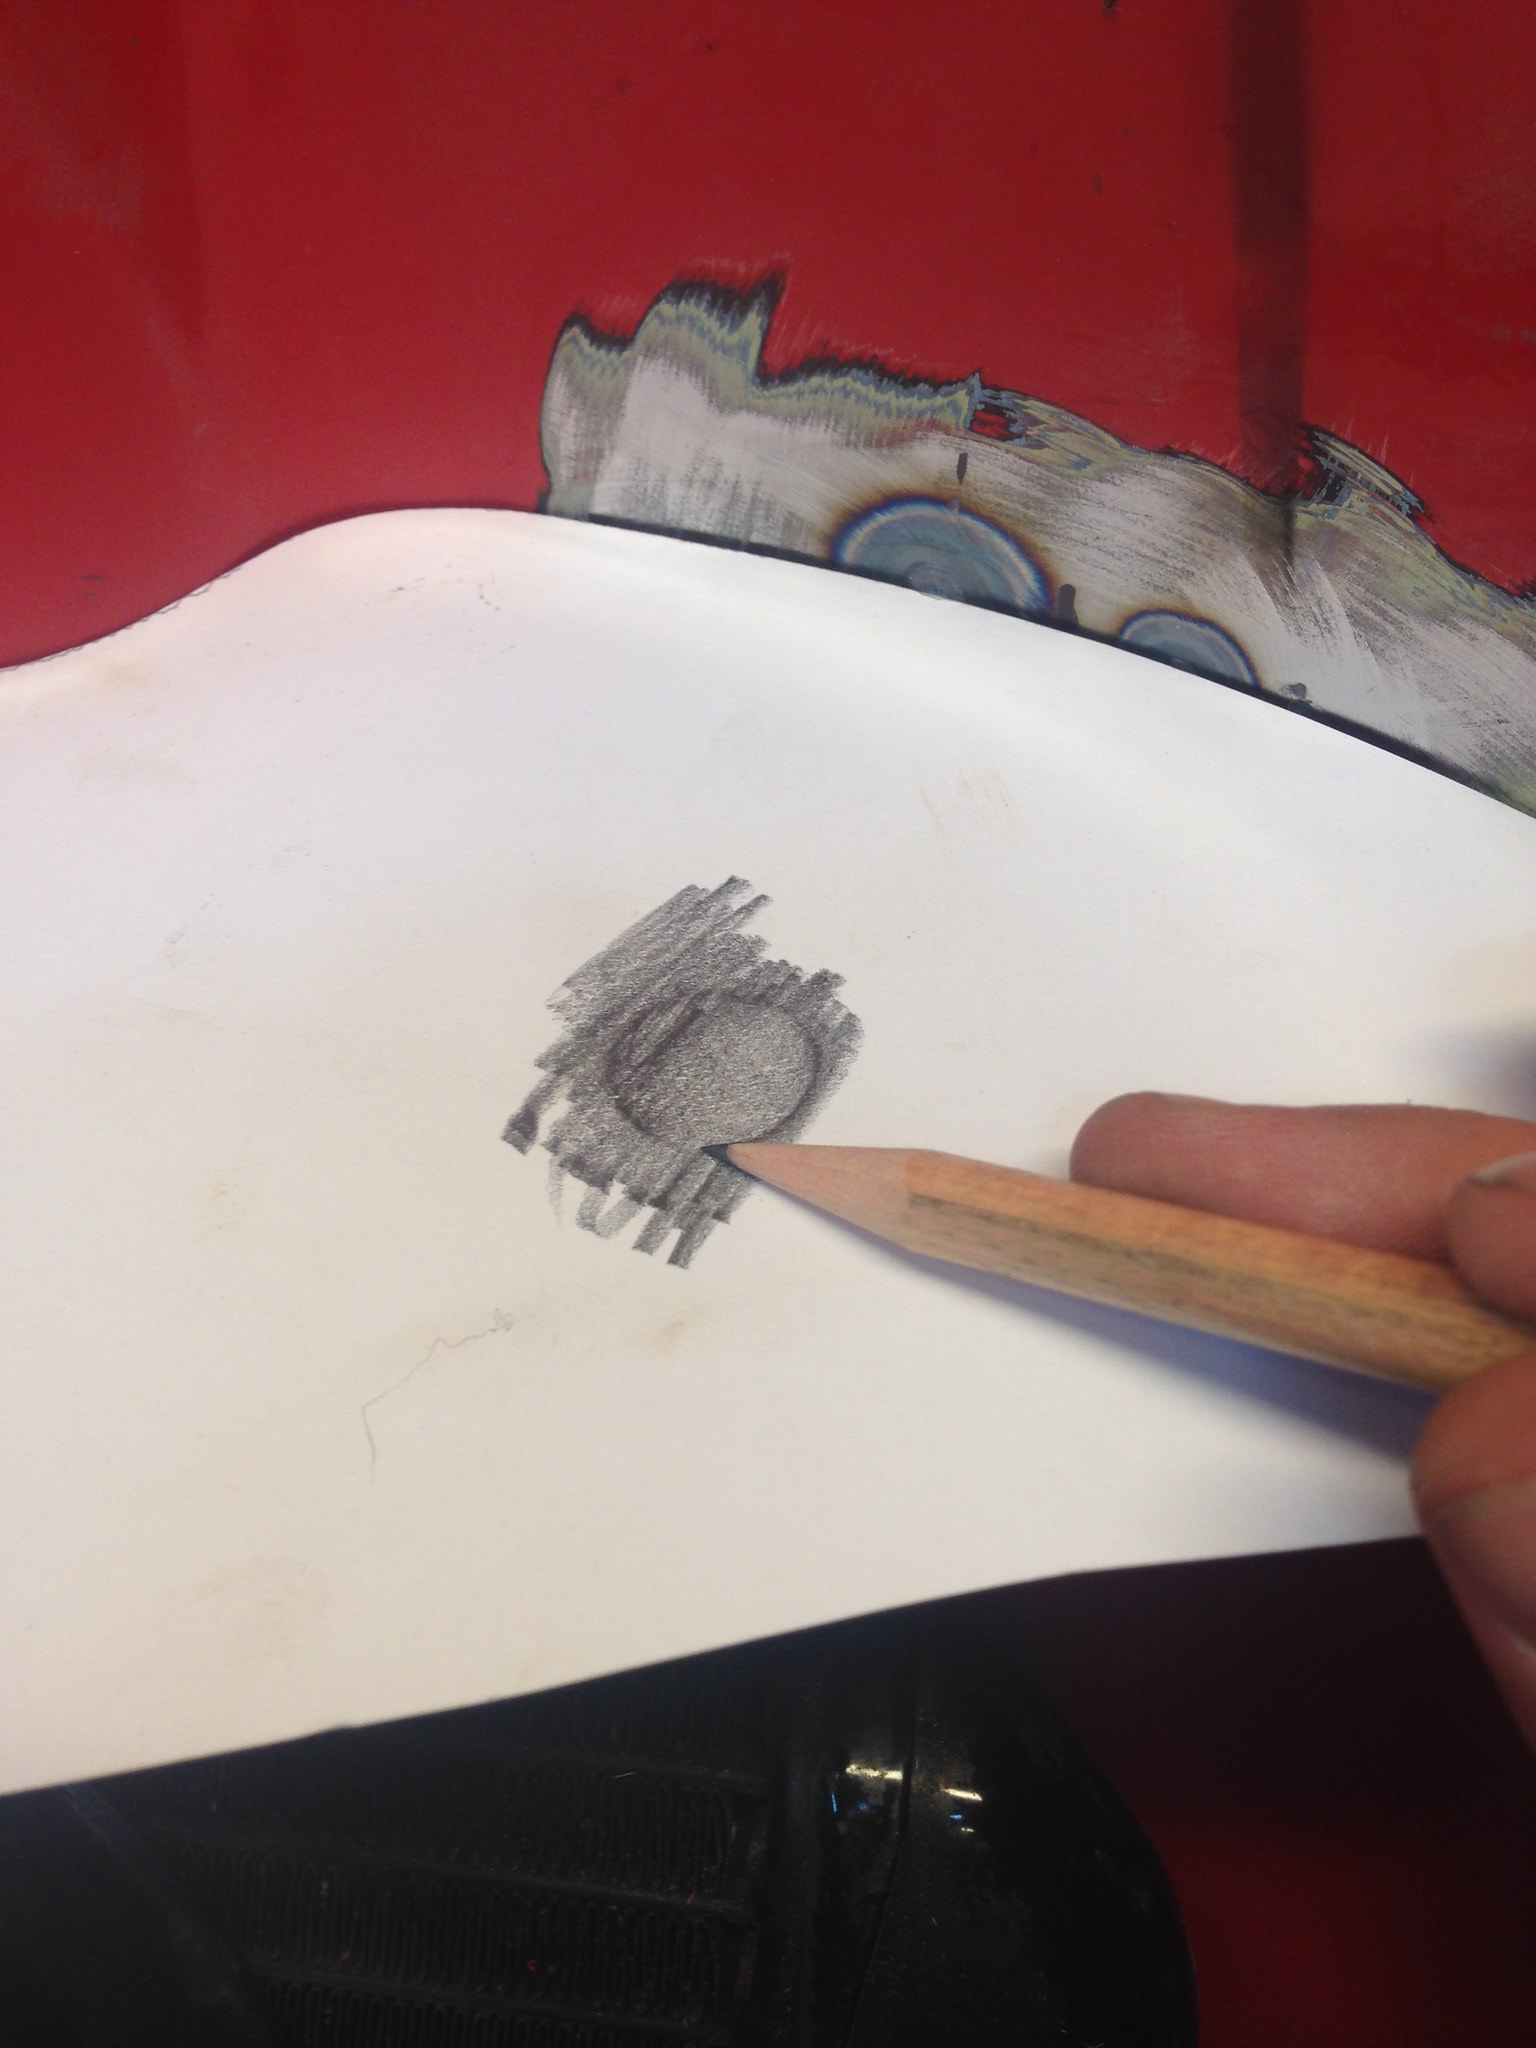
I then transposed the template onto a sheet of 20-gauge mild steel and cut it to shape, drilling and recessing the holes for the Dzus button mounts last.
 Rotax Lamby build-102
 by
PotvinV8, on Flickr
With the top panel in place, I then marked and trimmed the glovebox and tack welded the two together.
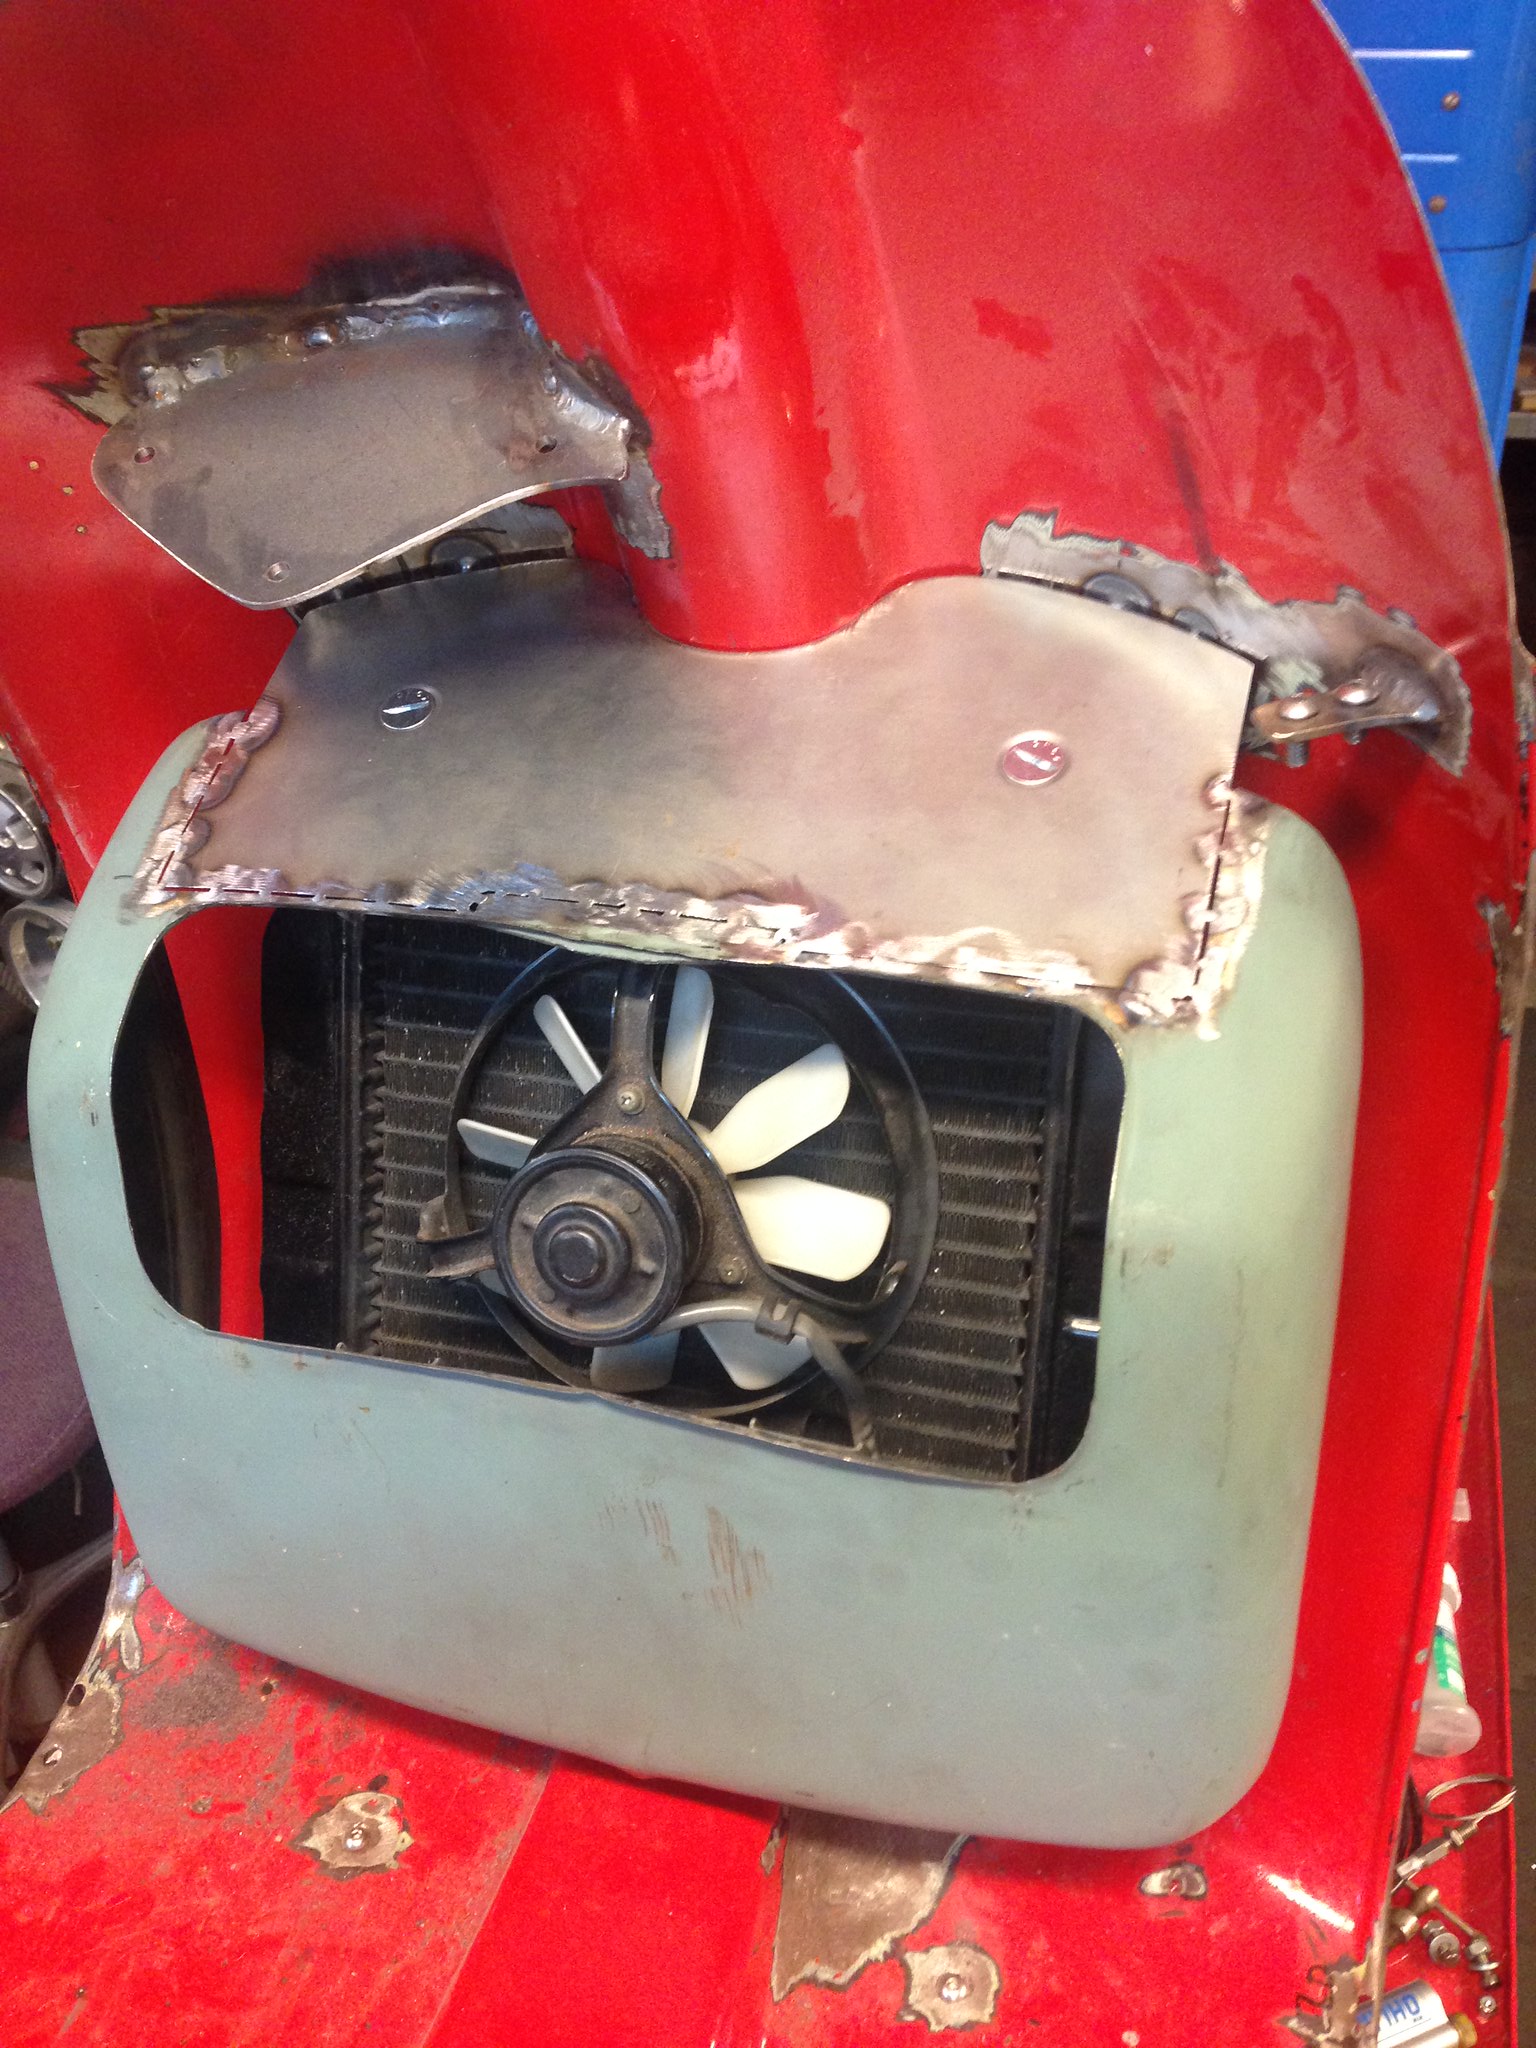 Rotax Lamby build-103
 by
PotvinV8, on Flickr
I used the same process for the bottom panel, which isn't visible from this angle, before mounting a pair of Dzus fasteners to the lower side corners as well. A pair of similar panels for the sides will finish up the glovebox/shroud.
 Rotax Lamby build-104
 by
PotvinV8, on Flickr
About the only complaint I have so far is that it's mounted a bit low because I'm using the front fender area to pull air through to feed the radiator. Give and take I guess...
 Rotax Lamby build-105
 by
PotvinV8, on Flickr
Once everything is tacked together, I'll weld it all up and perhaps add some louvers to help evacuate the air. If not, I figure I can make a set of arms that allow the glovebox door to remain open whilst riding and close up for show. Either way, it ain't gonna cool very good without some way to get the hot air out!
Re: Rotax 300 builld
Posted: Sun Oct 19, 2014 9:02 am
by DigDug
You should put this thread in a book.
If you do I'd like to reserve my copy now!

Re: Rotax 300 builld
Posted: Sun Oct 19, 2014 10:38 am
by shamrockexpress
Youre a handy bugger!!!!!!!!!!

keep er lit ya boy ya!!!!!!!!!!!